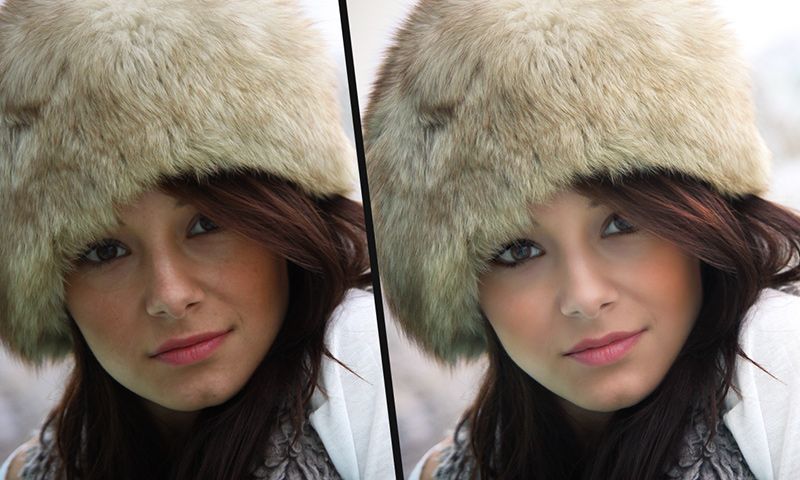
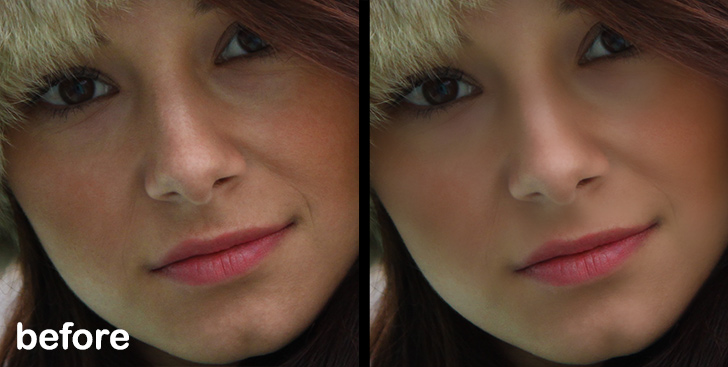
In this step by step tutorial, we will see how to achieve realistic and impressive portraits in Adobe Photoshop. First, we will see how to remove blemishes and soften skin. Enhance the portrait, re-sharp the image, and fix color tones. The key is to achieve realistic portraits.
Summary:
1. Remove Blemishes and other unwanted pores.
2. Soften the skin and enhance the portrait.
3. Fix color tones.
4. Final touches.
Tutorial Details
Difficulty: Intermediate
Apps Used: Adobe Photoshop
Estimated Completion Time: 20-35′ Minutes
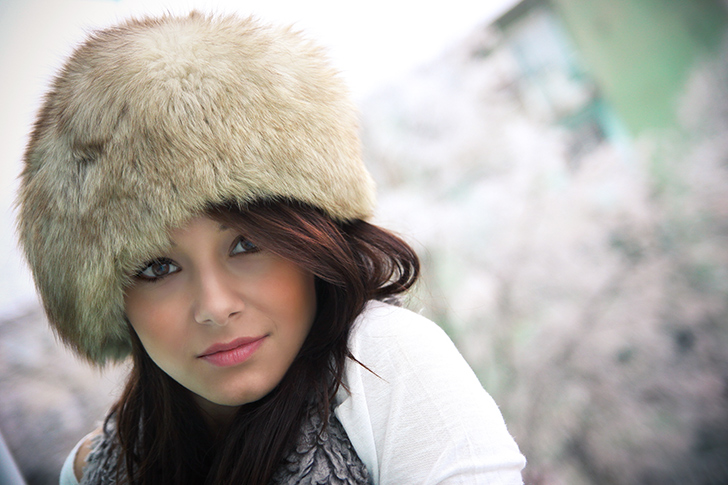
Resources: Girl with fur by catalin82
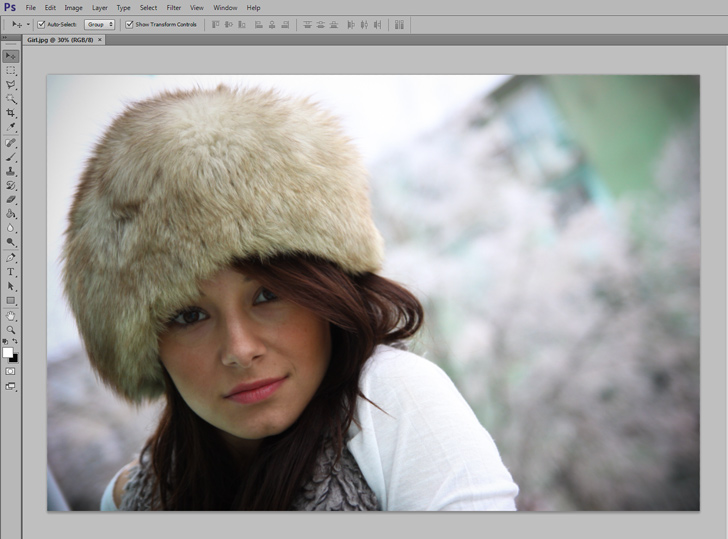
Step 1 > Open the Image
Open the portrait you want to retouch in Photoshop.
Step 2 > Clean the face
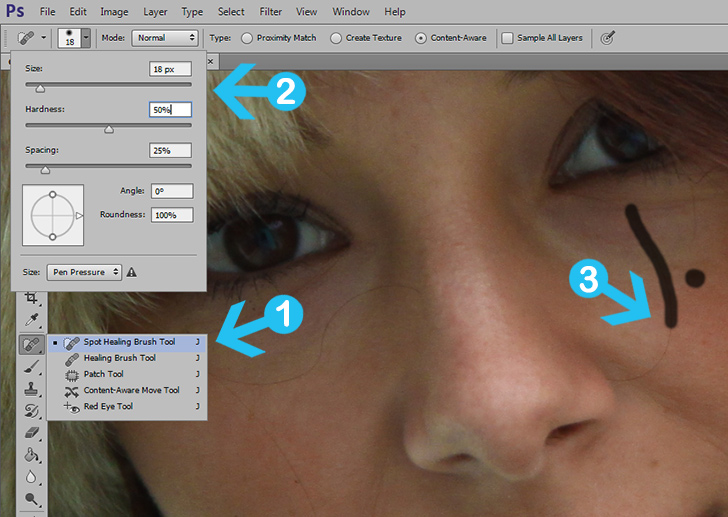
Before we start by going to Layer > Duplicate Layer to duplicate the first layer. In your toolbar pick the Spot Healing Brush Tool (J) with a small-sized brush, 50% hardness, and Content-Aware type. Paint over the blemishes and Photoshop will automatically remove them for you. Remove everything unwanted before we process to the next step.

Step 3 > Soften skin
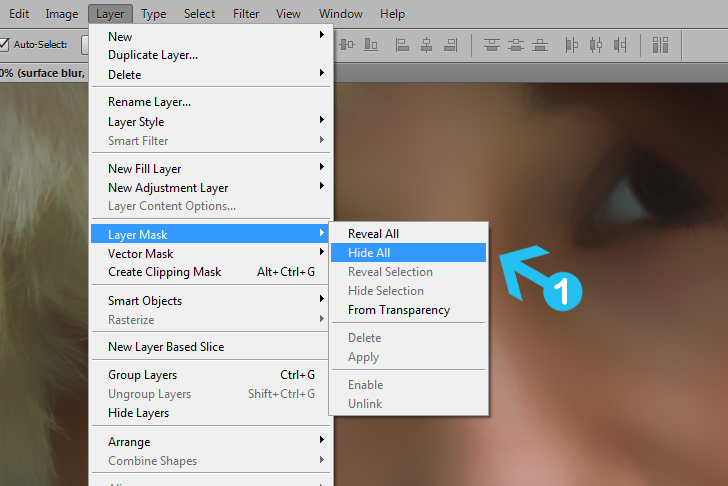
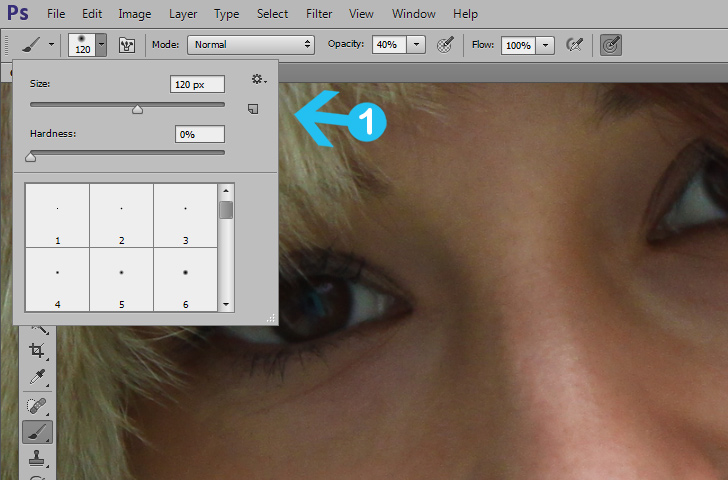
Duplicate your layer again by going to Layer > Duplicate Layer. Next, go to Filter > Blur > Surface Blur and add 25 Radius, 20 Threshold, and press OK. To add a layer mask go to Layer > Layer Mask > Hide All. Finally, pick a soft Brush (B) with 0 hardness, 120px size, and 40% Opacity. Paint over the face but leave eyes, nose edges, and lips.
Go to Filter > Blur Surface Blur.
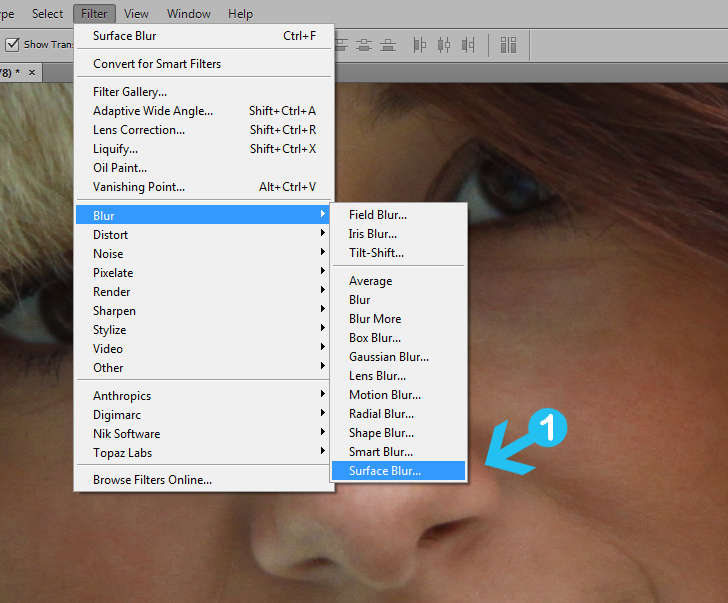
Add 25 Radius and 20 Threshold.

Create layer mask.
Pick a soft brush and paint over the face.
Step 4 > Merge layers
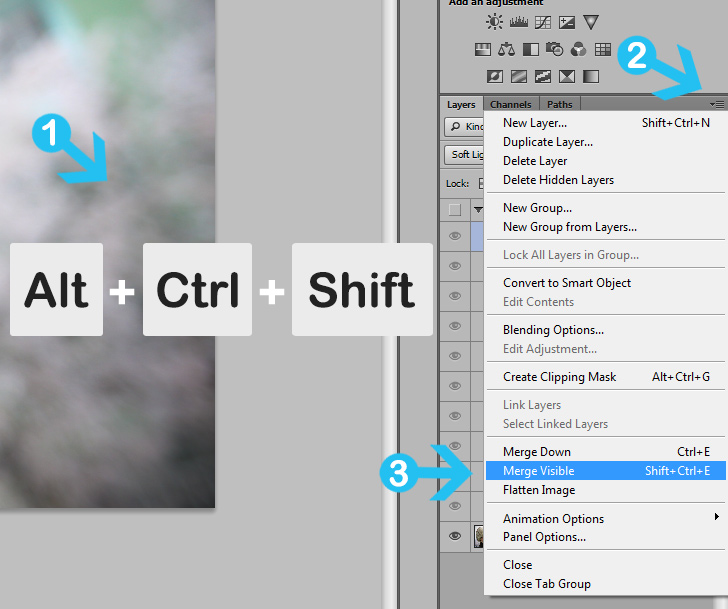
Merge all the layers except the first by using the old method (Ctrl + E) or while pressing (Alt + Ctrl + Shift) go to the layers tab options and press Merge Visible. This will create a new merged layer but will leave all the rest.
Step 5 > Face shape
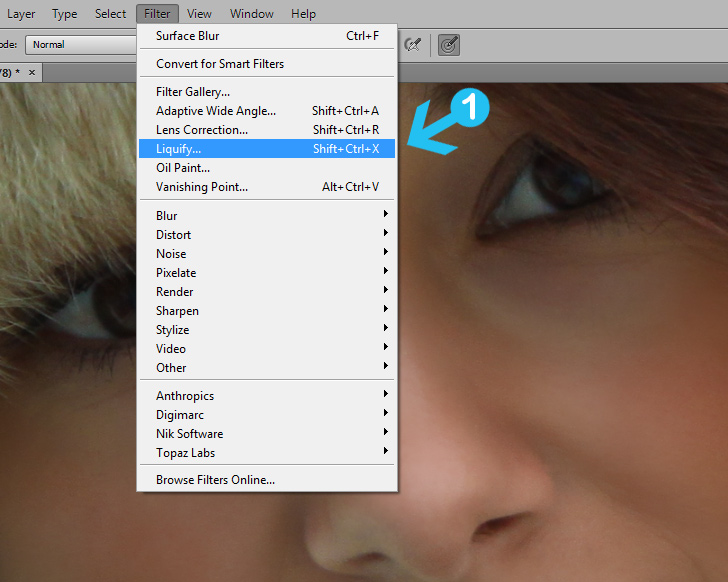
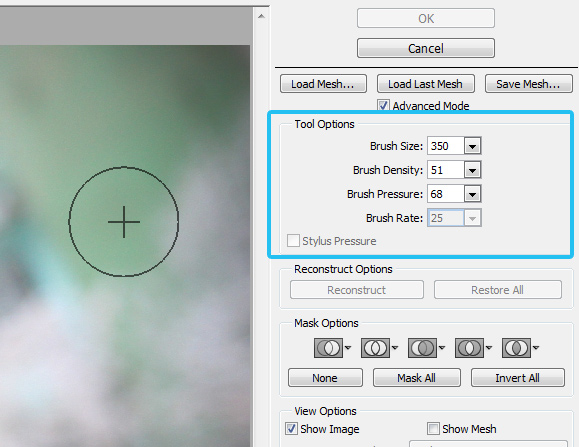
To improve the shape of the face and lips go to Filter > Liquify. Pick Forward Warp Tool with tool option: Brush size > 350, Brush density > 51, Brush pressure 68. Push the lips up to make them look smiling. Push the face to look thinner and when you like the result press OK. Ignore this step if you don’t want to change the face shape.
a) Go to Filter > Liquify.
b) Use Brush size 350, Brush density 51, and Brush pressure 68.
c) Push under the face and lips to change their shape.


Step 6 > Improve exposure
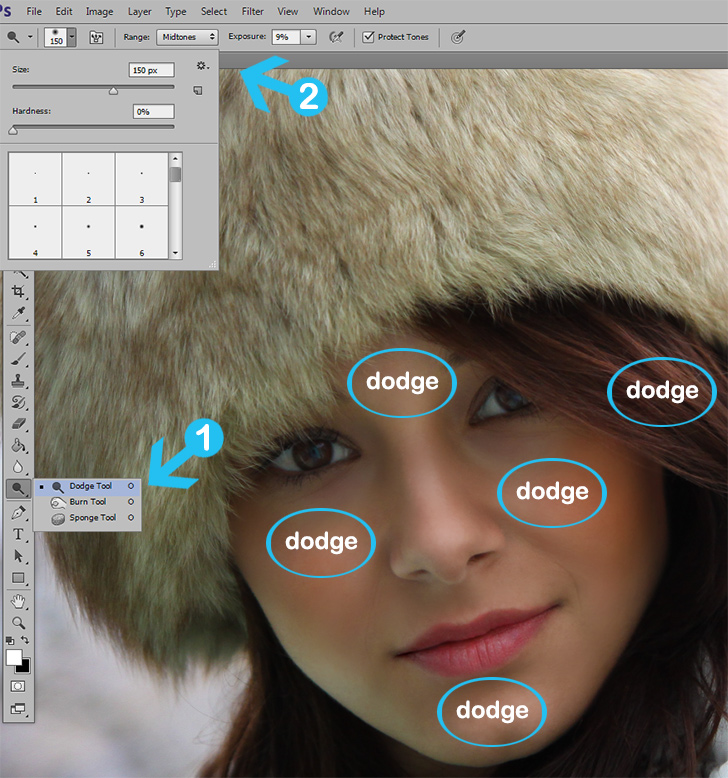
In your toolbox use Dodge and Burn to improve the portrait exposure. Use Dodge Tool to add light in specific parts and Burn Tool to darken parts of the image. Dodge and Burn will give the flat face a more 3D look. Try to follow the natural light conditions by adding more light in bright areas like eyes and highlights and darkening the parts where the light is less like eyebrows or under the face.
Step 7 > Fix color tones
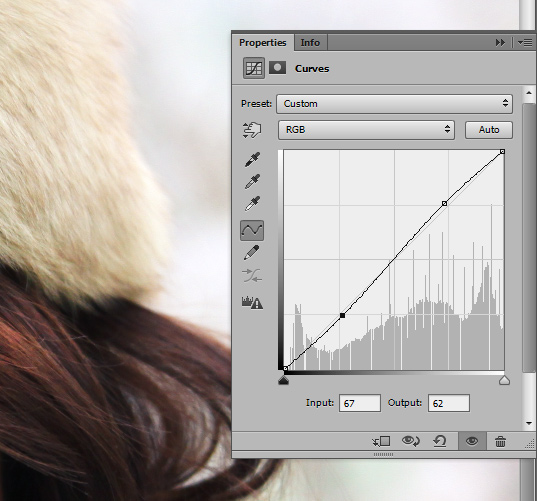
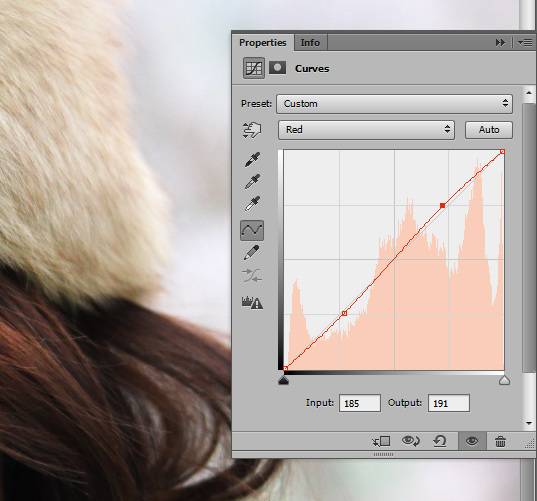
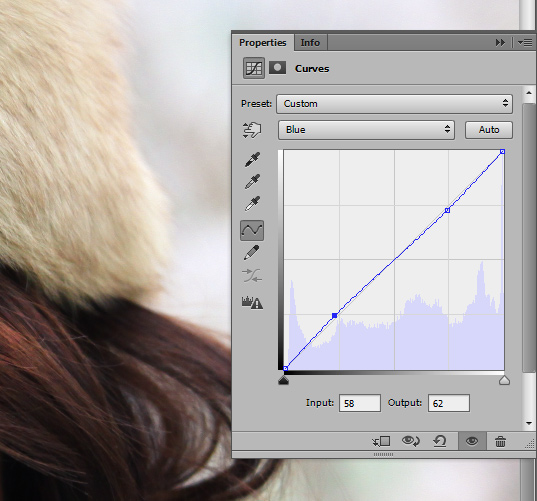
To fix color tones and add contrast go to Layer > New Adjustment Layer > Curves and add the following settings:
RGB Channel: Input 67, Output 62, or make it look similar to my s shape.
Red Channel: Input 185, Output 191, or make it look similar to my s shape.
Blue Channel: Input 58, Output 62 or make it look similar to my s shape.
Step 9 > Face light
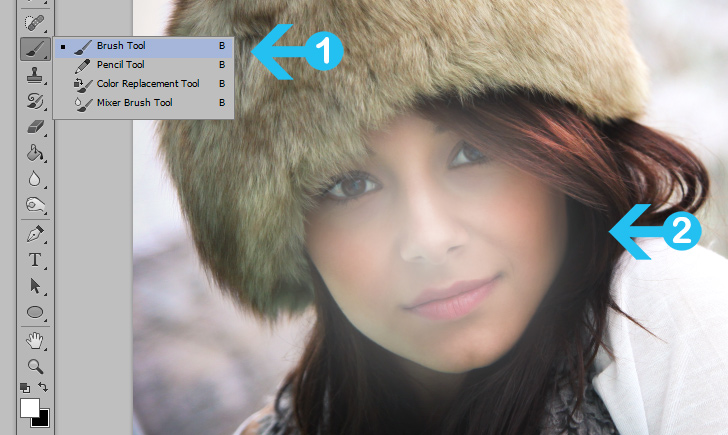
To add a nice face light, create a new layer and pick the Brush Tool (B). With a soft large brush paint over the face. Change the blending mode to Soft Light and lower the opacity to 60%.
Step 10 > Image sharpening
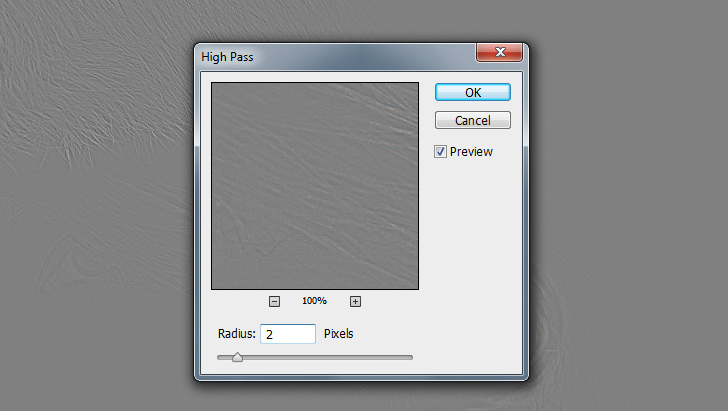
To sharpen the image we need to merge all the layers. A better technique is to press (Alt + Ctrl + Shift) and at the same time in the layers options menu press “Merge Visible”. This will create a new merged layer but will leave untouched all the rest. We used this technique in step 4. Next, duplicate the layer and go to Filter > Other > High Pass. Use 2 Radius and press OK. Finally, change the blending mode to Soft Light.

Conclusion
To make the portrait photo retouching look realistic you need to avoid adding too much contrast or surface blur. To sharpen the image you can use other tools other than high pass. Change color toning based on your image colors or preferences.
15,000+
Design Assets
- Instant Access
- Free Content Updates
- Constantly Growing Library
- Unlimited Downloads
- Simple Licensing


By Dreamstale
Get creative with our free & premium design resources. Download a vast collection of graphic design materials, such as graphics, sublimation designs, icons, textures, stock photos and more.
Plus get access to Photoshop tutorials & inspirational articles that will spark your imagination.


