For the duration of its dominance, Photoshop is a software marvel. Unlike other creative tools that have stayed at the top through sheer momentum, it has persistently innovated, and is more of a joy to use today than ever before due to a heady mixture of quality-of-life improvements (such as the still-fresh default transformation aspect ratio lock) and new features (what did we ever do before content-aware fill was added?).
Of course, that innovation has also made it extraordinarily complex, and most Photoshop users barely scrape the surface of what can be done. If you keep digging, you can keep finding new tactics to boost your efficacy and efficiency. I can’t say for sure that any one of the Photoshop developers knows it all, but what I can do is give you 6 simple hacks that you should know:

1. Merge visible layers
Gathering up a lot of layers doesn’t just cause confusion about where visual elements lie — it also makes it a pain to make aggregate changes, as well as apply certain effects (this is particularly annoying when you have a mixture of shape layers and raster layers, because grouping them up with heavily restricting the transformations you can apply).
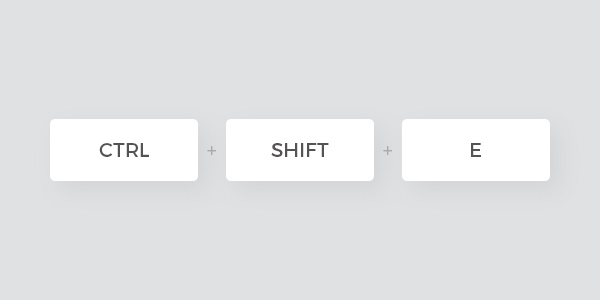
There’s also the issue of visual corruption that can appear when you stack layers with varying effects — but merging the layers clears things up and frees you up to apply transformations. Using Ctrl + Shift + E, you can merge only the visible layers, allowing you to keep hidden layers distinct.
Something I often find useful is doing this, copying the merged layer, reverting the merge, and pasting the layer into that file. That way, I get to work on the combined image in an unusual but fully non-destructive way, allowing easy testing and previewing of multiple variants.

2. Rotate the view
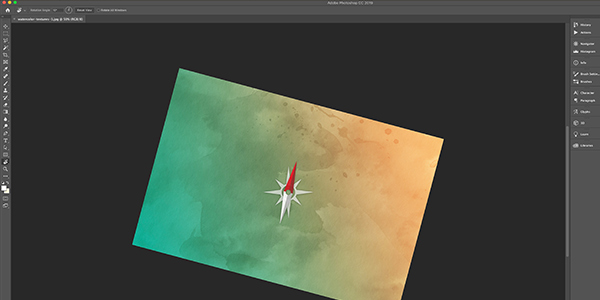
Despite using Photoshop for years, it somehow escaped me for a long time that you can simply press “R” then click and drag on the image to rotate your view. Whenever you think you could get something done more easily if the image were slanted, you can slant your perspective instead — and it doesn’t transform anything, so it’s entirely non-destructive.
When you’re done, you need only click Reset View to put things back as they should be. You can even apply the rotation to every window you have open. If you’re working on something ornate and/or circular, such as a logo or crest of the kind that’s so commonly used (Circle Logo Maker is a surprisingly good thematic baseline), this is great for neatening things up. If this function has somehow escaped you as well, then it’s about time you start using it to good effect!
3. Match Layer Color
There are plenty of graphic design tasks that can require you to stick to specific color schemes, and some need you to extend that focus past vector shapes to regular raster inserts. If you’re creating a UI template, you need to achieve a cohesive style. This is particularly vital for e-commerce: for the sake of driving conversions, every storefront needs color consistency.
But color consistency can be annoying, particularly when you’re dealing with inconsistently-sourced product images (regardless of whether you’re mocking them up or creating final images for a live site). One solution is to apply colored overlays set to Hue or Color, but that’s quite drastic, and can obscure a lot of important detail — shoppers need to be able to see what they’re considering purchasing, and quickly (you can lose trust in as little as 1/20th of a second, after all).
Another route I like involves the Match Color function: stack tiled images as separate layers, pick out one that has the colors you like, then use Image -> Adjustments -> Match Color, pick the name of the file in Source, and pick that preferred layer in Layer. You may need more tweaking, but this will typically do a good job of bringing two images with wildly-different lighting and coloring closer together.
4. Customize a content-aware fill
Content-aware fill has been around for a while, but what you may not know is that you can now customize your fill if you go about it in the right way. If you go through the right-click approach of Fill -> Contents: Content-Aware, you won’t get any options: it’ll just go ahead and apply. But if you go through Edit -> Content-Aware Fill, you’ll get a set of options.
These options allow you to do things including set the opacity, alter the sampling area and account for rotation. This hack is particularly convenient for dealing with product images because they tend to involve a lot of symmetry but can have backgrounds get in the way. By removing the background from the sampling area, you can achieve far-superior results.
5. Auto-select layers
When you get thirty layers deep into a complex design, you can start to lose track of which layers feature the shapes you’re trying to move, which can be enormously frustrating — you start going through every layer, hiding and unhiding it to see what happens. It helps somewhat to name and group layers, but that’s assuming you manage to remember what you meant when you named a particular layer (not a given).
Usefully, Photoshop has an auto-select option that shows up in the main tool options bar when you select the Move tool. Tick it, and whenever you click with that tool inside the image window, Photoshop will automatically select whichever layer is responsible for that pixel. It’s not always useful, but when you have countless visible elements on the screen and you’re trying to shuffle them around, it’s a huge time-saver.
6. Undo Repeatedly
Photoshop’s History window is extremely useful when you’re making a lot of experimental alterations and often want to go back to how you had things several iterations ago. Originally, the standard Ctrl + Z shortcut for undoing your last step essentially served as a toggle for that change — but this was updated, and these days you can keep hitting it to go back more steps.
What’s more, if you’re working on a really complicated piece, you might get annoyed at your history steps getting cut off (only being able to undo to a certain extent). This is due to your History States setting, which is something you can change. Go to Edit -> Preferences -> Performance and change the History States setting to whatever you deem adequate (200, 300, it’s up to you). A higher number might affect performance, of course, so be careful.
In conclusion
Everyone who uses Photoshop picks up different ways of doing things, so if you didn’t know any of these, don’t feel attacked! It’s just a matter of being open to trying new methods and functions, and remembering that there’s always something new to do with Photoshop, no matter how long you’ve been using it.

Author: Kayleigh Alexandra
Micro Startups is a community website & we donate all our profits to charity. Championing microbusiness and startups.
Find Micro Startups on Twitter


