Masks are one of Photoshop’s most useful features to control the layer’s transparency. We’ll look at the differences between the layer mask and clipping mask and how they work on a practical level.
A mask controls the behaviour of a collection of pixels. Similar to carbon paper, we can control the visibility of pixels in different parts of our image. Wherever a mask is active, a pixel becomes transparent. Where a mask is inactive, a pixel remains opaque. So basically masks can be used to hide or reveal what’s underneath. By using masks we have precise control over the interaction between layers.
Resources: Wind Turbines & Moon by Meetu Singhal
Layer Mask Example
Let’s suppose that we want to remove the background from our object. Instead of selecting and deleting the pixels, we can use Layer Mask to hide the pixels we don’t want. In this way, we can reveal the hidden pixels any time we want but we can’t do the same if we delete the pixels. So, we have precise control over the pixels.
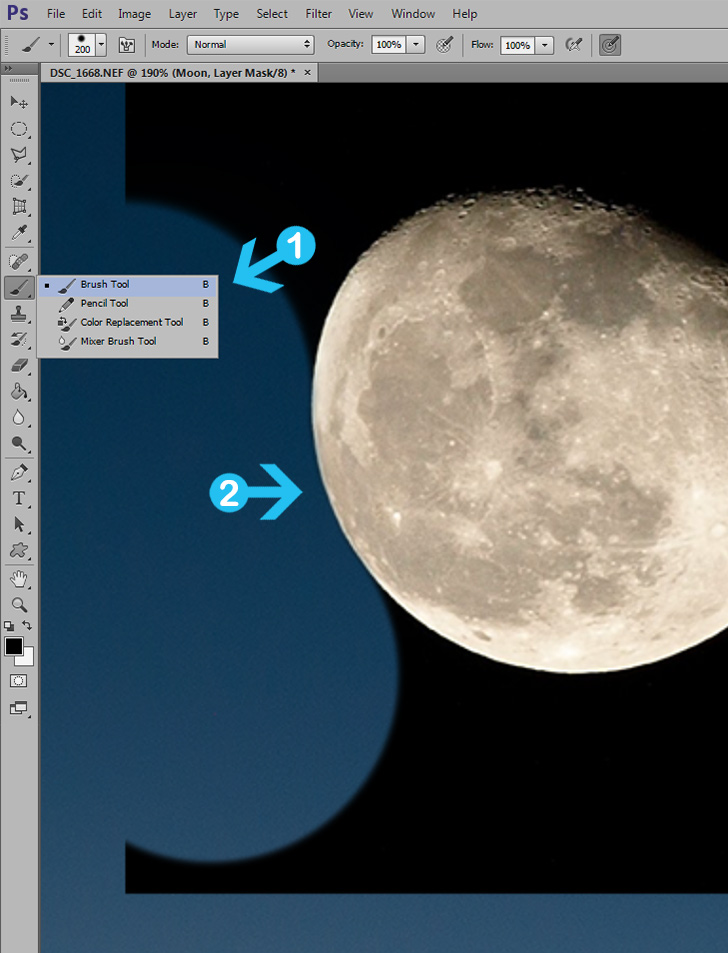
Open the images you want to edit in Photoshop. In my example, we will remove the black background from the moon (image a). To create a layer mask for the moon go to Layer > Layer Mask > Reveal All. With the layer mask active pick the Brush Tool (B) with black colour (#000000) and 95% hardness. Draw over the pixels you want to hide (image b).
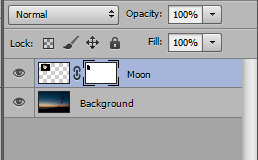
After we finish the “Moon” layer mask will look like the (image c). If you want to reveal back pixels simply change the colour of your brush to white (#ffffff) and draw over the hidden pixels.
1) Open the images in Photoshop

2) Pick the Brush Tool (B) with 95% hardness and black colour. Draw over the pixels you want to hide.
3) Layer Mask after we have done.
Clipping Mask Example
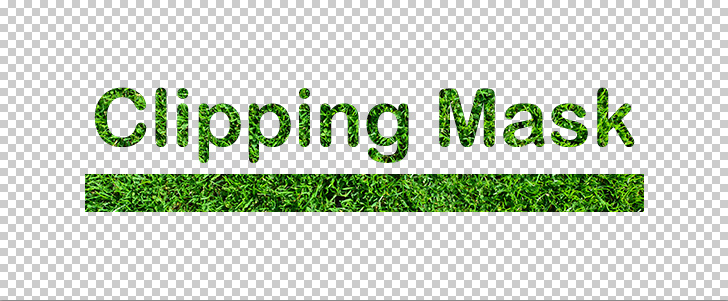
With Clipping Mask we can mask the image to the opaque pixels of the bottom layers. In other words, the shape of the clipping mask can affect multiple layers at the same time. We can work faster with a clipping mask when you want to mask shapes or selections.
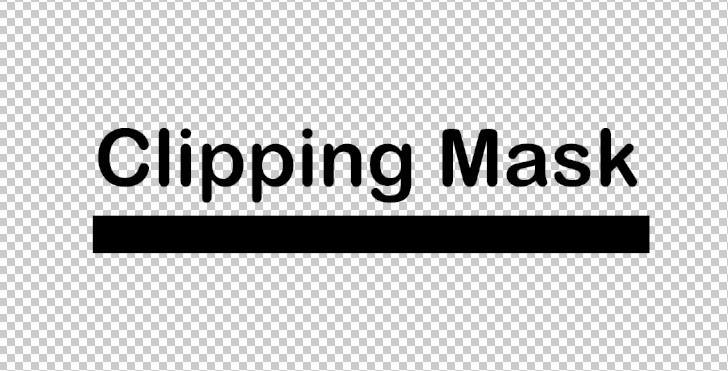
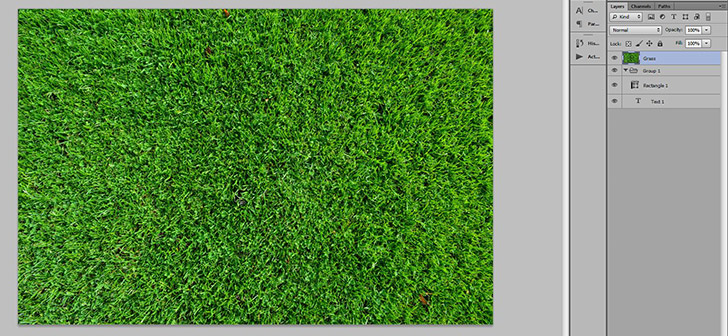
Let’s suppose that we want to add a grass texture to our text and shape (image a). Import the grass image and place it over the text and shape the layer group (image b). The easiest way to create a clipping mask is to press Alt / Option + Left Click between the grass layer and text and shape layer group (image c).
1) Text and Shape
2) Grass texture image.
3) Alt / Option + Left Click to create quickly a clipping mask.

Result
Conclusion
Both are powerful tools and will make your life much easier in Photoshop. Layer Mask is great for selection, gradients or when you need to hide small objects. With the Clipping Mask tool, you have more control over the transparency and multiple layers.
15,000+
Design Assets
- Instant Access
- Free Content Updates
- Constantly Growing Library
- Unlimited Downloads
- Simple Licensing


By Dreamstale
Get creative with our free & premium design resources. Download a vast collection of graphic design materials, such as graphics, sublimation designs, icons, textures, stock photos and more.
Plus get access to Photoshop tutorials & inspirational articles that will spark your imagination.


