Photoshop is an incredibly powerful photo-editing tool, perfect for people who want to make professional-looking compositions. Whether it’s tweaking an existing photo or creating a wholly new one from scratch, Photoshop is the go-to program for image manipulation and creation. A great way to get started using this powerful software is to explore the workspace. Learn how and where to access basic photo editing tools like levels, color balance, and crop. Then try some more creative approaches such as applying filters and blending multiple images together.
Discover the endless possibilities of image manipulation with a bit of practice and exploration. Photoshop provides an ideal platform to flex your creative muscles, allowing you to experiment until you’re able to create stunning visuals.
If you’re just starting out with Photoshop, check out these 7 tips for getting the most from your creative software. From basic tools and tricks to cropping and blurring backgrounds, let’s explore what there is to know about this powerful program.
1. How to Zoom in on Photoshop
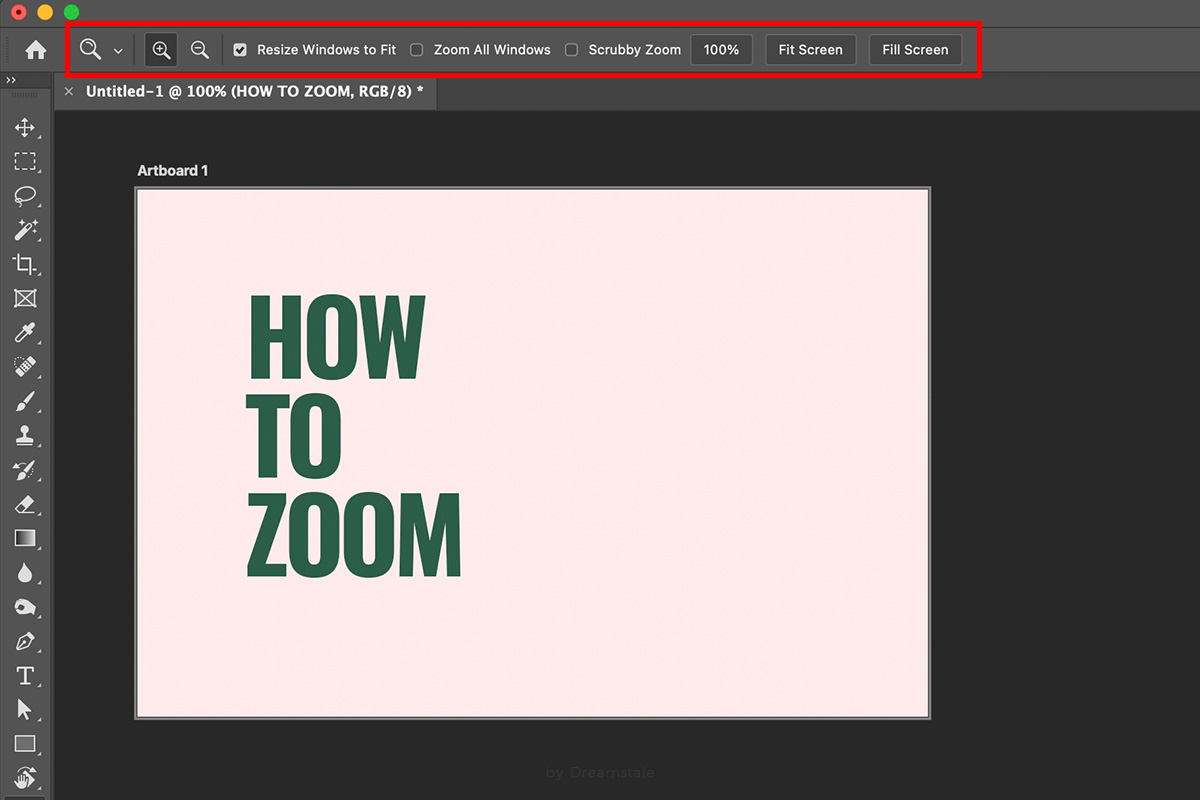
Select the Zoom Tool from the toolbar on the left side of the screen.
Alternatively, you can press Z on your keyboard to select the Zoom Tool. Once selected, click on the area of the image you want to zoom in on. Each click will zoom in by a preset percentage, which can be adjusted in the Options Bar at the top of the screen.
2. How to Deselect / Unselect in Photoshop
To deselect in Photoshop, you can use any of the following methods:
Using Keyboard Shortcuts
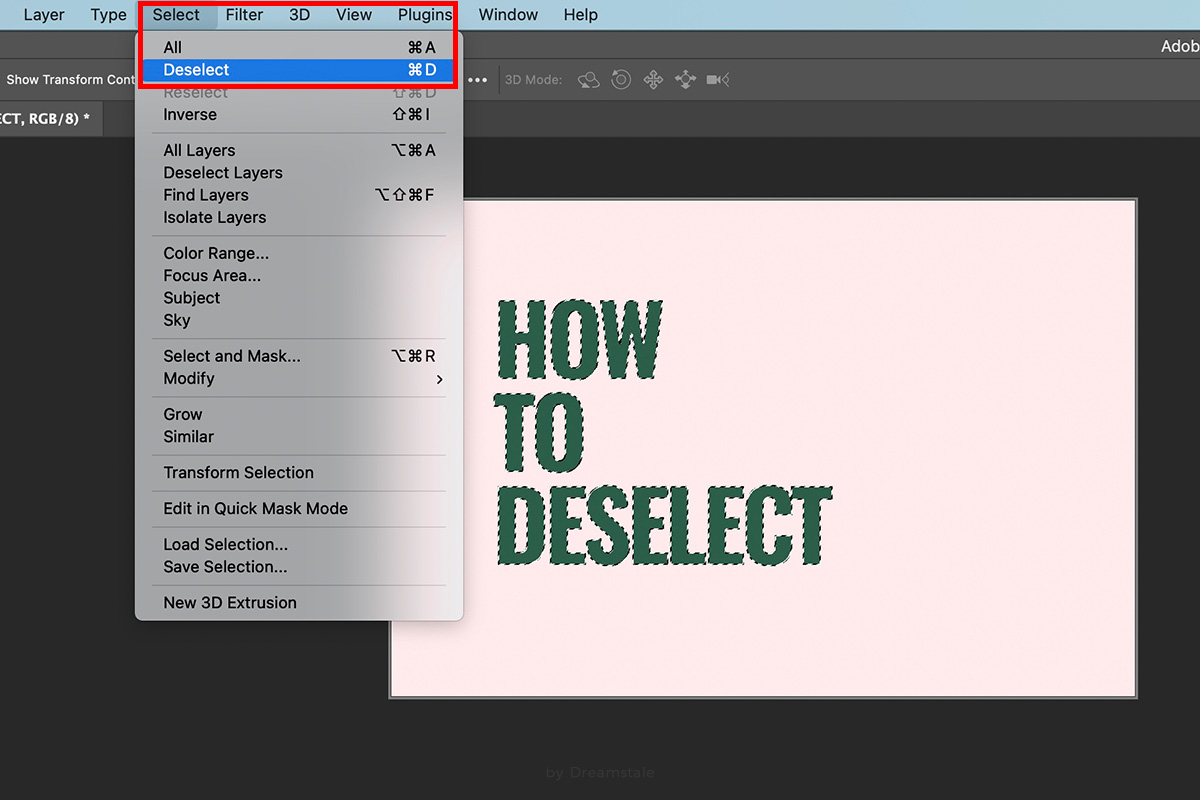
Pressing Ctrl + D on Windows or Cmd + D on Mac will deselect any active selection.
Using the Menu Bar
Click on the “Select” menu in the Menu Bar at the top of the screen, and then select “Deselect” from the drop-down menu.
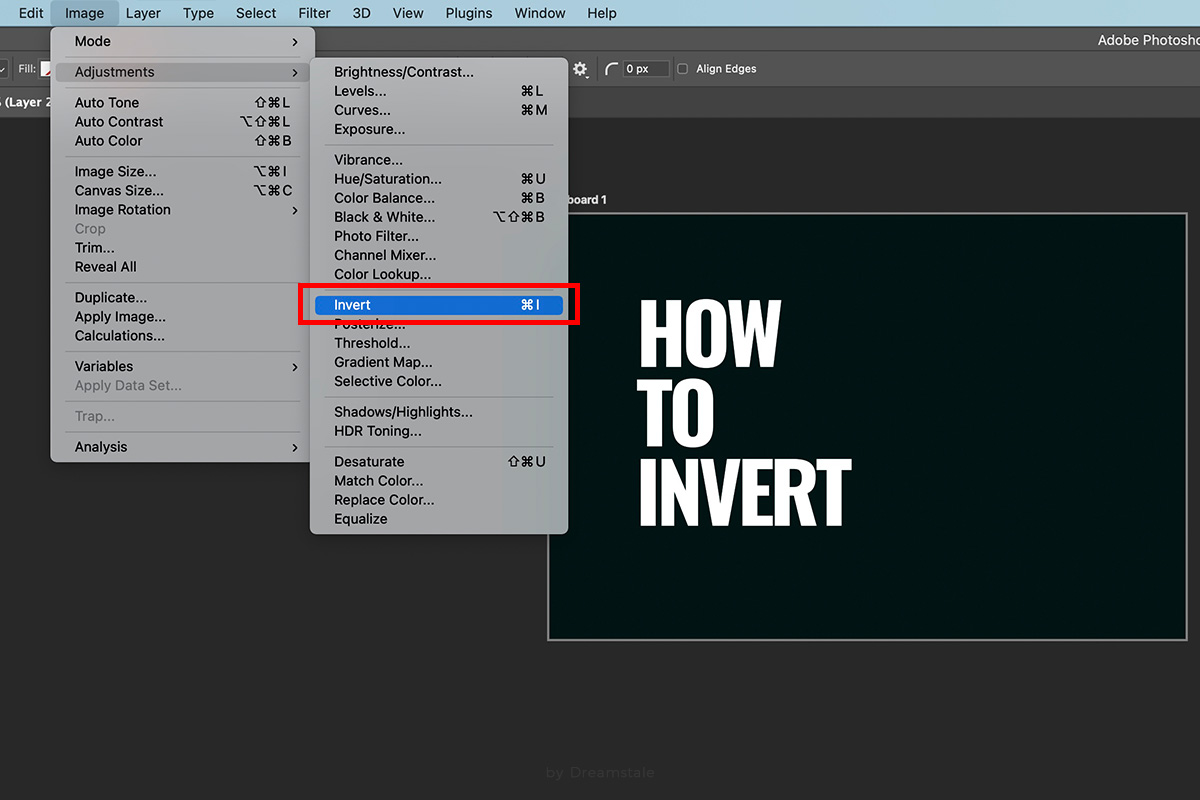
3. How to Invert Colors in Photoshop
To invert colors in Photoshop, you can click on the “Image” menu in the Menu Bar at the top of the screen. Select “Adjustments” from the drop-down menu, and then select “Invert” from the list of adjustments.
Alternatively, you can use the keyboard shortcut Ctrl + I on Windows or Cmd + I on Mac to invert the colors.
You should see the colors in the image inverted, with the dark areas becoming light and the light areas becoming dark.
4. How to Group Layers in Photoshop
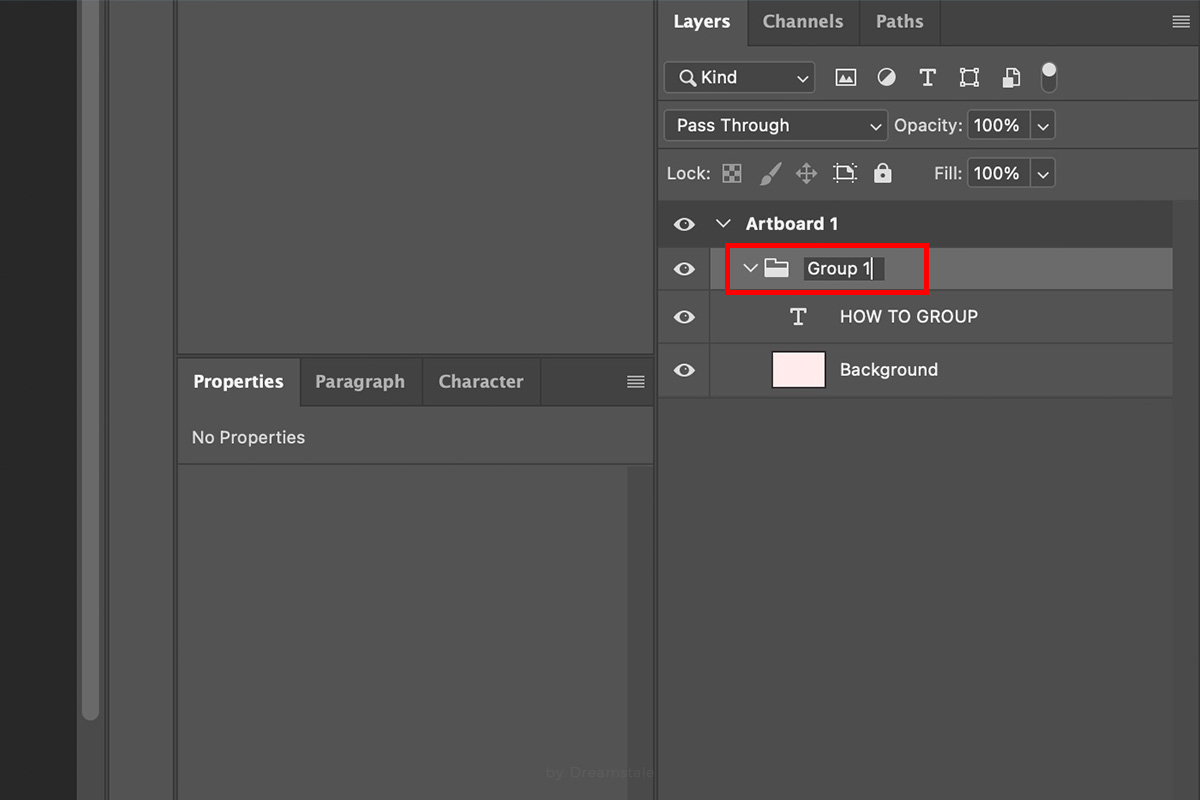
To group layers in Photoshop, you can use any of the following methods:
Using the Layer Group Button
Click on the top-most layer you want to group in the Layers Panel. Then, click on the “Create a new group” button at the bottom of the Layers Panel. This will create a new layer group containing the selected layers.
You can then drag and drop other layers into the group to add them to the group.
Using the Layer Menu
Select the layers you want to group by clicking on each layer while holding down the “Shift” key. Then, go to the “Layer” menu in the Menu Bar at the top of the screen, select Group Layers, and then click “New Group from Layers“. This will create a new layer group containing the selected layers.
Using a Keyboard Shortcut
Select the layers you want to group by clicking on each layer while holding down the “Shift” key. Then, press Ctrl + G on Windows or Cmd + G on Mac to create a new layer group containing the selected layers.
To rename a group, simply double-click on the group’s name in the Layers Panel and enter the desired name.
To collapse or expand a layer group, click on the arrow to the left of the group’s name in the Layers Panel. Clicking on the arrow will collapse the group, hiding the layers inside, while clicking on it again will expand the group, revealing the layers inside.
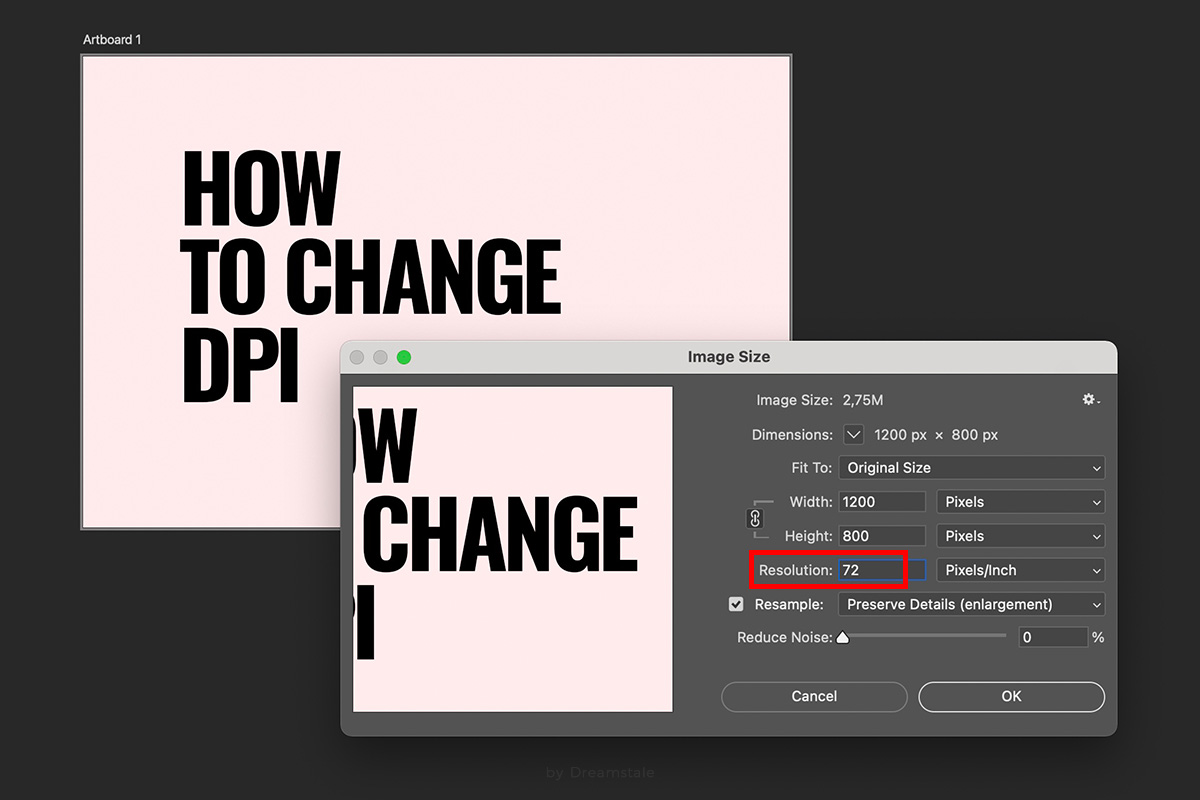
5. How to Change DPI in Photoshop
To change DPI (dots per inch) in Photoshop, go to the “Image” menu in the Menu Bar at the top of the screen and select “Image Size”.
In the Image Size dialog box, make sure the “Resample Image” box is checked. Change the DPI value in the “Resolution” field. Note that changing the DPI value will also change the pixel dimensions of the image if the “Resample Image” box is checked.
If you want to change the DPI without changing the pixel dimensions of the image, uncheck the “Resample Image” box before changing the DPI value. This will ensure that the pixel dimensions remain the same, while the physical dimensions of the image will be adjusted according to the new DPI value.
Click OK to apply the changes.
6. How to Rotate Text in Photoshop
To rotate text in Photoshop, you can select the Type Tool from the toolbar on the left side of the screen. Click anywhere on the image to create a new text layer and type the text you want. With the text layer selected, go to the “Edit” menu in the Menu Bar at the top of the screen and select “Transform” and then “Rotate”. You can now rotate the text by dragging the corner handles or by entering a specific angle value in the options bar at the top of the screen.
You can also use the keyboard shortcut Ctrl + T on Windows or Cmd + T on Mac to activate the Transform tool, and then right-click on the text to select “Rotate” from the contextual menu.
Once you have rotated the text to your desired angle, click on the checkmark in the options bar or press “Enter” to apply the changes.

7. How to Crop a Layer in Photoshop
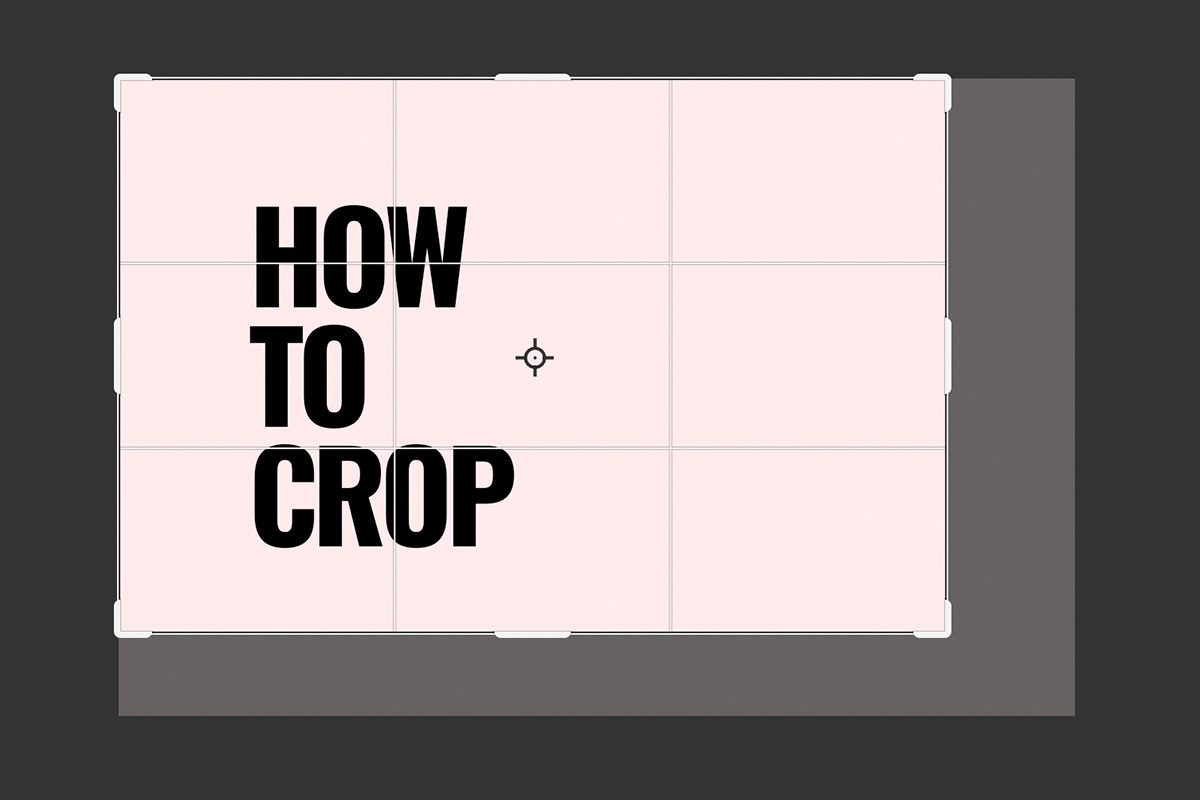
To crop a layer in Photoshop, select the layer you want to crop in the Layers Panel on the right-hand side of the screen. Choose the Crop Tool from the toolbar on the left-hand side of the screen.
Alternatively, you can press “C” on your keyboard to select the Crop Tool.
Use your cursor to click and drag over the area of the layer you want to keep. You can adjust the size and position of the crop using the crop handles that appear around the edges of the selection.
Once you are satisfied with the selection, press Enter on Windows or Return on Mac to apply the changes.
Conclusion
Photoshop is a versatile and powerful tool for manipulating images, as long as you understand the basics of using it. With just a few helpful tips, you can master this software in no time. While exploring the workspace and learning tools like levels, color balance, crop, filters, and blending approaches, you will unlock an entire world of photo-editing possibilities. Each project that you create utilizing your newfound skills in Photoshop will be unique and special,
15,000+
Design Assets
- Instant Access
- Free Content Updates
- Constantly Growing Library
- Unlimited Downloads
- Simple Licensing


By Dreamstale
Get creative with our free & premium design resources. Download a vast collection of graphic design materials, such as graphics, sublimation designs, icons, textures, stock photos and more.
Plus get access to Photoshop tutorials & inspirational articles that will spark your imagination.

