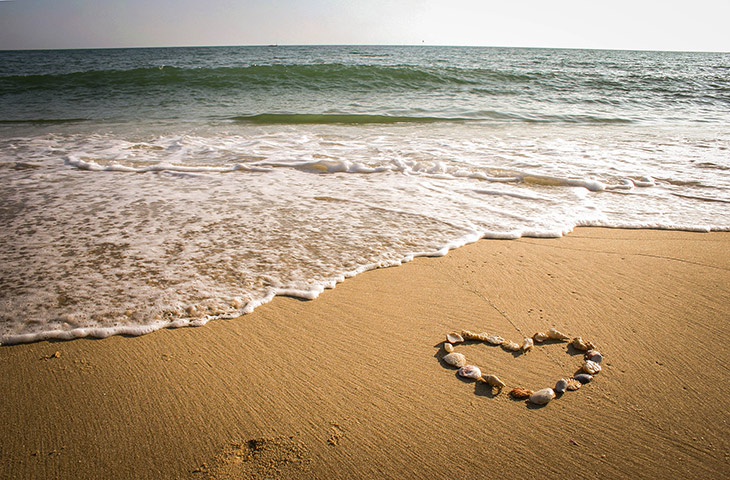
The beach photograph is a classic in the photographic industry, both for professional and amateur photographers. Using both skill and creativity, we can make a simple scene remarkable with just one shot of our camera – but which elements are required for a proper beach scene?
First, you need a good camera and proper knowledge of how to use it. Even though you can rely on your intuition in most cases, beach scenes can be tricky because of lighting conditions in the sky, as well as a reflection of the water. You need to learn when and where to shoot your images in order to match the concept you have for your picture. If you don’t, the result will not be worth all your efforts.
Next, you need to be creative. Small details mean everything. Perhaps it seems to you that shooting some waves breaking on the shore would a good image, while shooting a pair of sunglasses on the sand with some waves receding from the shore may just be much more appealing than the first idea. Walkthrough the scenario and let your eyes be your guide before you jump right into doing the classic beach scene. This is your work, not somebody else’s.
Not only that but of course beach scenes require post-production techniques. Through this guide, we are going to learn how to accomplish the post-production of a beach scene inside Lightroom with the help of our always user-friendly presets.
Tutorial details and resources
Difficulty: Beginner
Apps: Adobe Lightroom
Estimated Completion Time: 10-15′ Minutes
Resources: Tutorial Presets
Step 1 > Open Lightroom
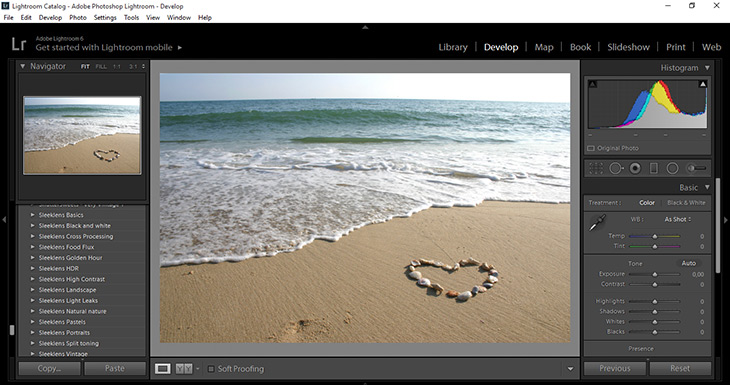
After importing your picture into Lightroom, it is time to work your way through the tools Lightroom offers.
Step 2 > White Balance
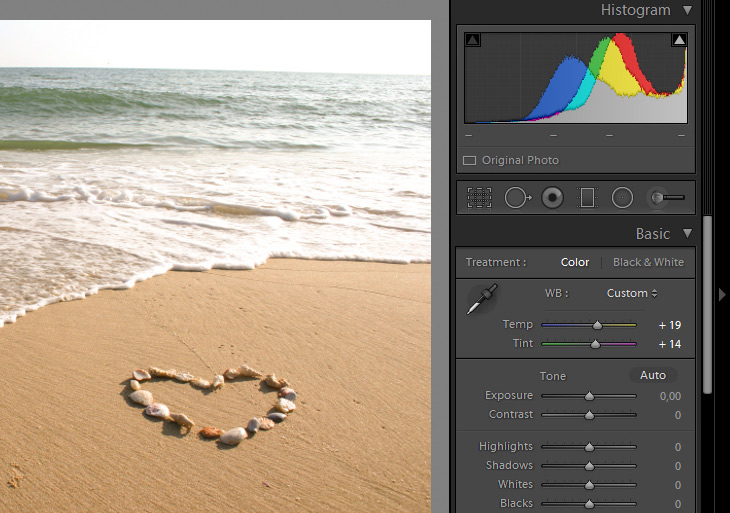
Start by opening the Basic panel and adjust the White Balance. You can do this adjustment using one of the following options:
- Via Preset – With the option ‘As Shot’, you can select other options for WB values. This is only available for RAW images.
- Via Sliders – With the Temp/Tint slider, which is the most common way to adjust White Balance, since it applies to every kind of scene/format you may have.
- Via Dropper tool – With this tool, you are required to sample a neutral gray area (R, G, B values have to be equal) in order to achieve a neutral white tint.
Working with the sliders, I will compensate the WB towards a warmer temperature and tints that are more reddish.
[adinserter block=”2″]
Step 3 > Contrast
For this image, I will leave Exposure value as is, since the image is not suffering from exposure issues. Please remember that in case your image does look slightly burned/dark, it is best to fix it using another appropriate option rather than with the Exposure slider. This slider is well known for possibly harming your image post-production if you don’t handle it very carefully, since you may either burn or darken out data in the process.
Increase the Contrast slider to bring more life to the image.

Step 4 > Clarity
At this point, I will just apply a bit more Clarity to this image.
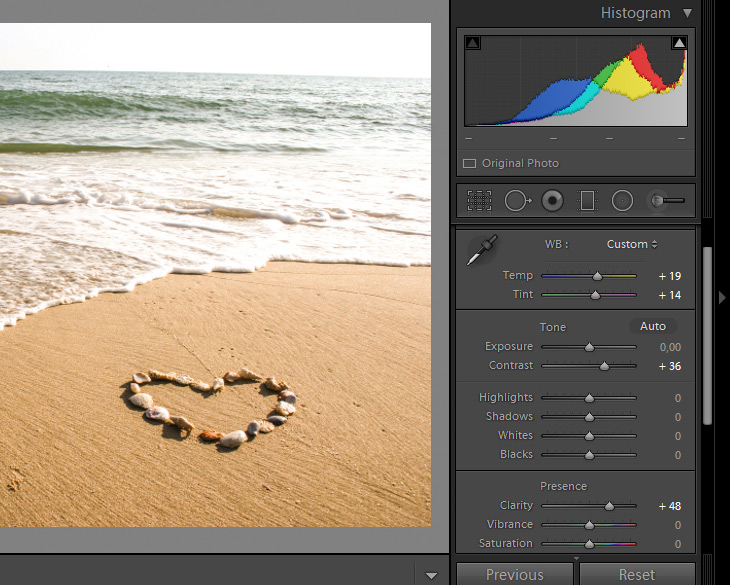
Before applying presets, let’s do a quick before/after shot to compare the results we have achieved so far.

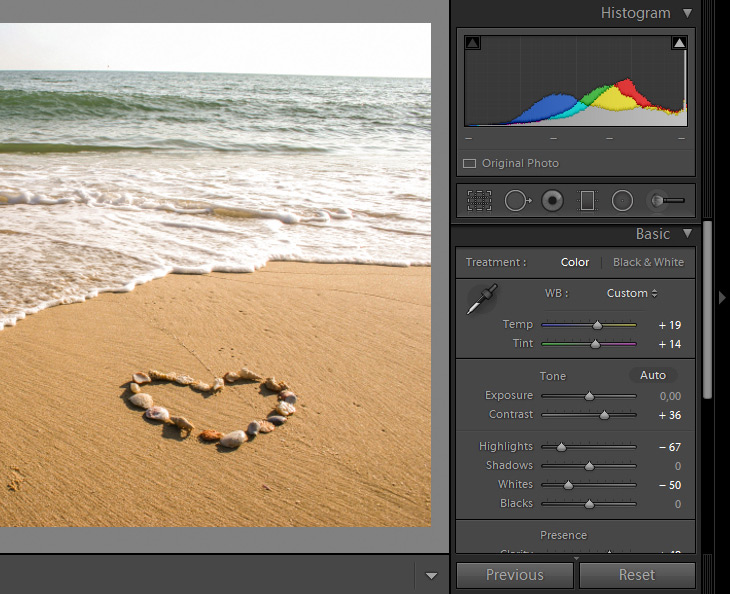
Step 5 > Highlights & Whites
In my opinion, we are moving in the right direction. The sand seems much warmer and more inviting, whereas the water seems to be a bit heavy on the Highlights, wherefore I need to reduce that value. I also reduced Whites in the very same step to prevent losing too much detail because of the harsh lighting conditions.
[adinserter block=”2″]
Step 6 > Presets
Speaking of Lightroom, we need to mention the wonder of Presets. These small but effective “tools” make all the difference in our work, especially if we are processing a large number of images in bulk.
For those who don’t know what I am talking about, Lightroom Presets can be defined as sets of instructions for Lightroom’s native tools, enabling us to accomplish the task we need in only one click. Lightroom does not work the same way Photoshop does in that it doesn’t need Plugins to get things done. Presets are somewhat similar to filters, but not exactly, since with Photoshop Filters you need to give the software the parameters in order to perform the task, whereas Lightroom Presets work on their own when we select them.
High quality presets are ones that do not bring the noise to the image, ones that will not add any other effect than the one intended, and they are crafted with care to match any and all situations a photographer may encounter in his or her daily work. This is the way designers like Sleeklens work, bringing to us amazing elements that turn our images into beautiful works of art.
Now, for this image I want to apply the Sleeklens Golden Hour presets, which can do wonders with sunny scenes, beach scenes, and even landscapes.
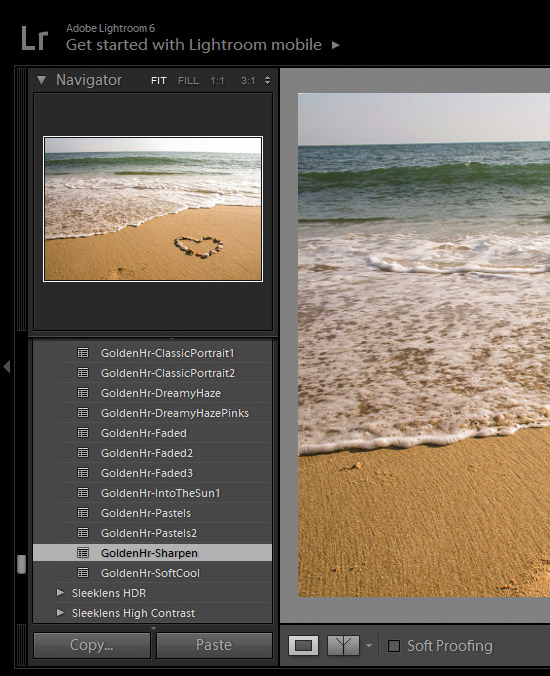
At the Develop Presets panel, open the category where your desired presets are stored.
Apply the GoldenHr-Sharpen preset to bring more detail to the image.
Finally, apply GoldenHr-AddSunRight to your image in order to simulate sunbeams coming from the right direction.
Finish your composition with some cool effect – such as Lens Vignetting – or feel free to explore the possibilities presets can provide by achieving different effects with only a few clicks.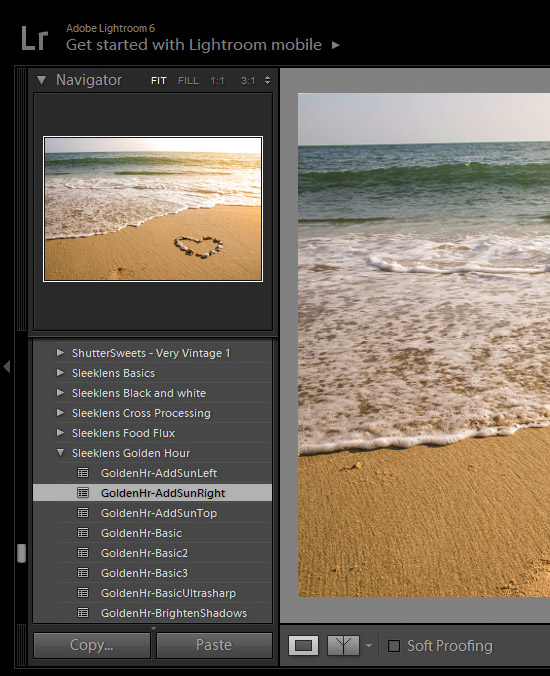
Final Image

Last Words
As you can see, the number of different adjustments possible with Lightroom is nearly infinite. Users can fully express their creativity with the tools provided, so for both amateurs and professionals taking photographs is not just a matter of pointing and shooting, but rather a matter of handcrafting images, which takes both time and dedication if you want your work to stand out in this competitive industry.
Keep in mind that Lightroom has no hidden secrets – Practice and dedication will make all the difference in improving your skills with this software. Good luck and keep editing!

Author: SleekLens
We are a team of passionate photographers.We continually create fresh and unique Lightroom presets that you can use to create your own photographic masterpieces.
Follow SleekLens on: SleekLens.com | Facebook | Twitter


