If you run an online store or blog image optimization is a very important part of building a successful online presence. Reducing site load time benefits you and your visitors and encourages Google to index your images to their image directory.
In this quick tutorial, We will learn how to optimize images and reduce the file size significantly.
Tutorial Details
Difficulty: Beginner
Apps Used: Adobe Photoshop
Estimated Completion Time: 5′ Minutes
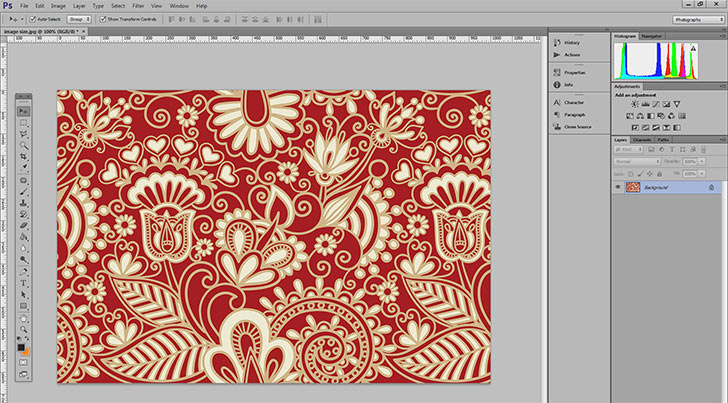
Step 1 > Import the Image into Photoshop
Open the image you want to optimize by drag and dropping to Photoshop or go to File > Open and browse the image you want to optimize. If you don’t want to edit the colors or crop the image you are ready for the final step.
Step 2 > Optimize the Image
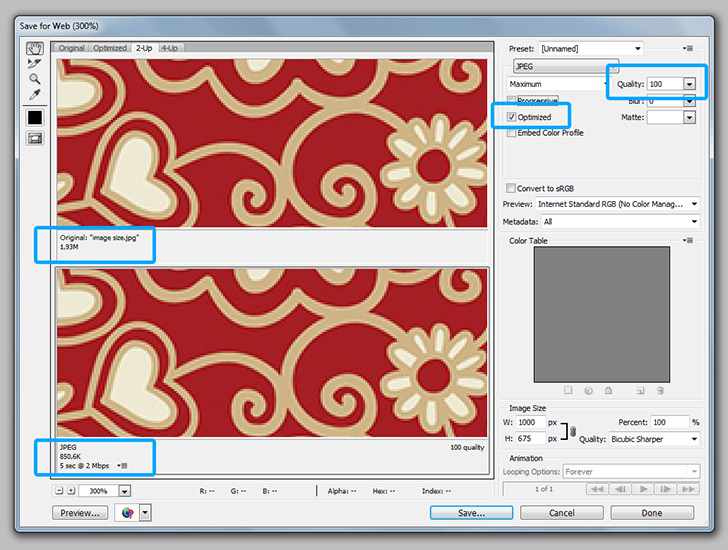
Go to File > Save for Web or press (Alt + Shift + Ctrl + S). In the new window use the 2-Up preview method and make sure the “Optimized” box is checked.
As you can see even with 100% maximum quality optimized file is only 850kb, 100% less than the original image (1.93 MB). Huge difference compared to the original and the best thing is that you can’t see any differences in overall image quality. You can still lower the quality to less than 100 and the file size will shrink even more. Next, press “Save” to save your optimized image.
Conclusion
If you’re looking to make improvements to your website, optimized images can provide a great boost. Reducing the size of your images and properly naming them with useful keywords can help speed up the load time of your site and may even give you a better ranking on search engines. Good names provide meaning to the content within an image, making it easier for search engine algorithms to understand and rank appropriately.
Taking an extra few moments when working with images can prove to be beneficial in the long run.
15,000+
Design Assets
- Instant Access
- Free Content Updates
- Constantly Growing Library
- Unlimited Downloads
- Simple Licensing

By Dreamstale
Get creative with our free & premium design resources. Download a vast collection of graphic design materials, such as graphics, sublimation designs, icons, textures, stock photos and more.
Plus get access to Photoshop tutorials & inspirational articles that will spark your imagination.


