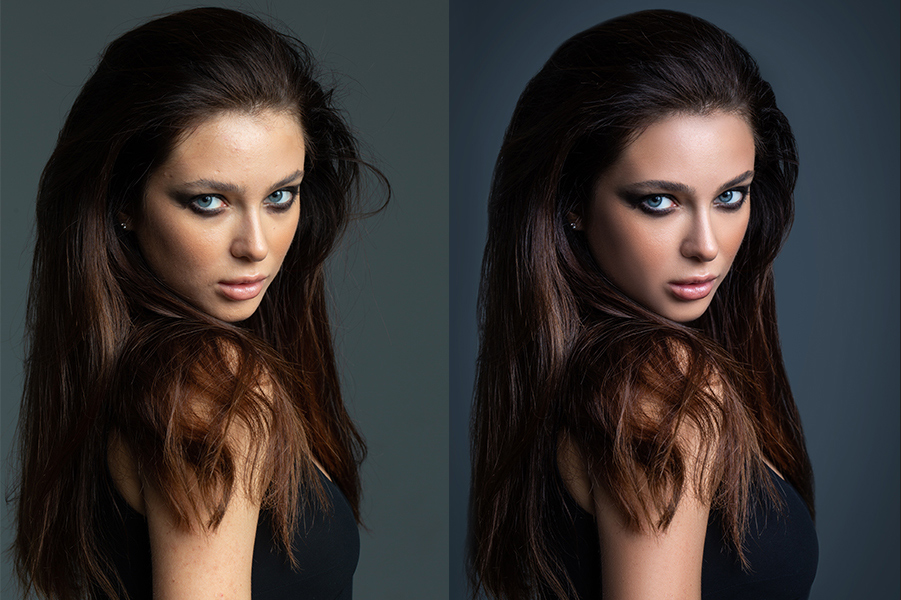
If you’re a portrait photographer, you know how difficult and long it can be to retouch and remove stray hairs in Photoshop. Read this tutorial and follow 8 easy steps of getting rid of flyaway stray hairs in Adobe Photoshop with the Healing Brush tool.
Tutorial details and resources
Difficulty: Beginner
Apps: Adobe Photoshop (CS5-CS6, CC)
Estimated Completion Time: 20-30′ Minutes
Resources: FixThePhoto Retouching
Step 1 > Color Correction
a) Open the photo in Photoshop and make a basic color correction in the Camera Raw Filter. The White Balance should be set up to Auto settings.

b) To remove yellow tints on the face and body skin, set the Temperature to about 4600
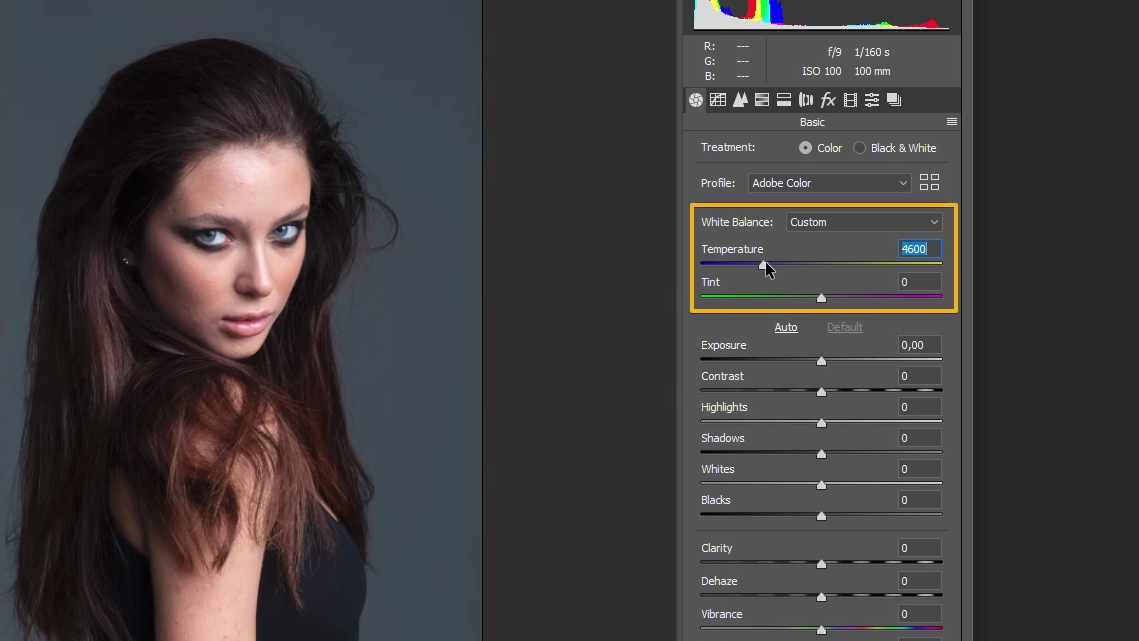
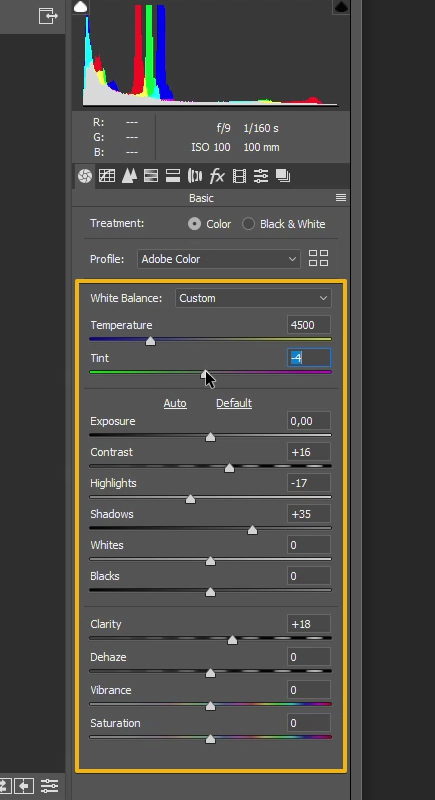
To achieve the color effect this portrait photo has, set the color settings to the following indicators:
Tint -4
Exposure 0
Contrast +16
Highlights -17
Shadows +35
Whites/Blacks 0
Clarity +18
Dehaze/Vibrance/Saturation 0
These settings are usually used for studio portraits to highlight the model’s face, eyes, and makeup.
Step 2 > Remove Skin Blemishes
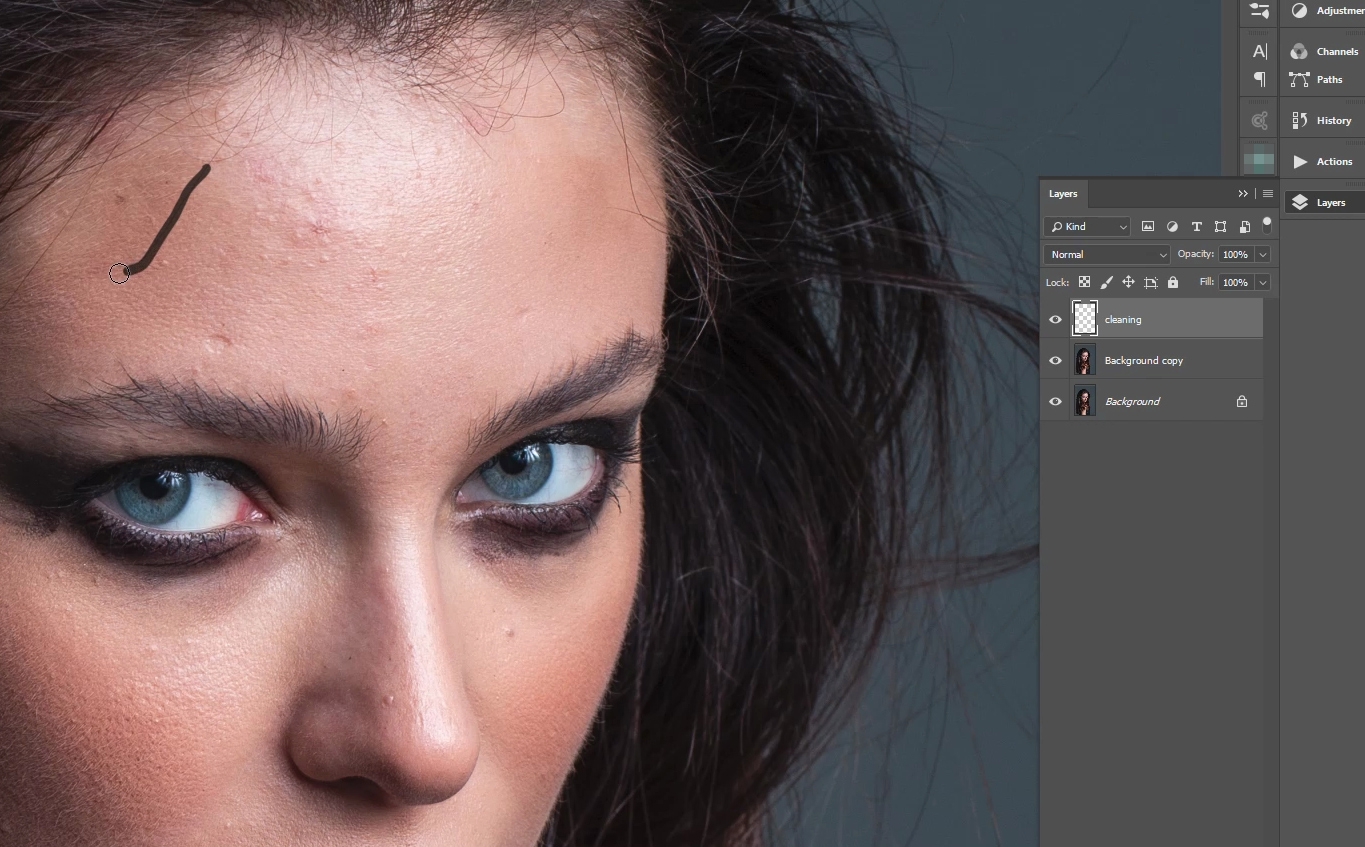
Copy the main layer and create the empty layer above. Then choose the Healing Brush tool and try to remove the biggest problem areas on the skin (small hairs, pimples, dimples, etc.). Do not forget to tick the Sample All Layers button.
Step 3 > Skin Retouching
a) Let’s make a Frequency Separation. It splits texture from color and makes skin retouching much simpler! Create a New Layer, merge all the layers below, and named it as Color. Duplicate it, name Texture, and create the empty New Layer and named it Work.

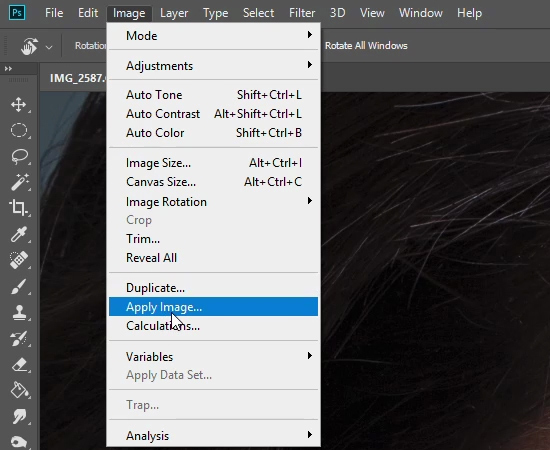
b) The next step is to select the layer with the texture and go Image > Apply Image.
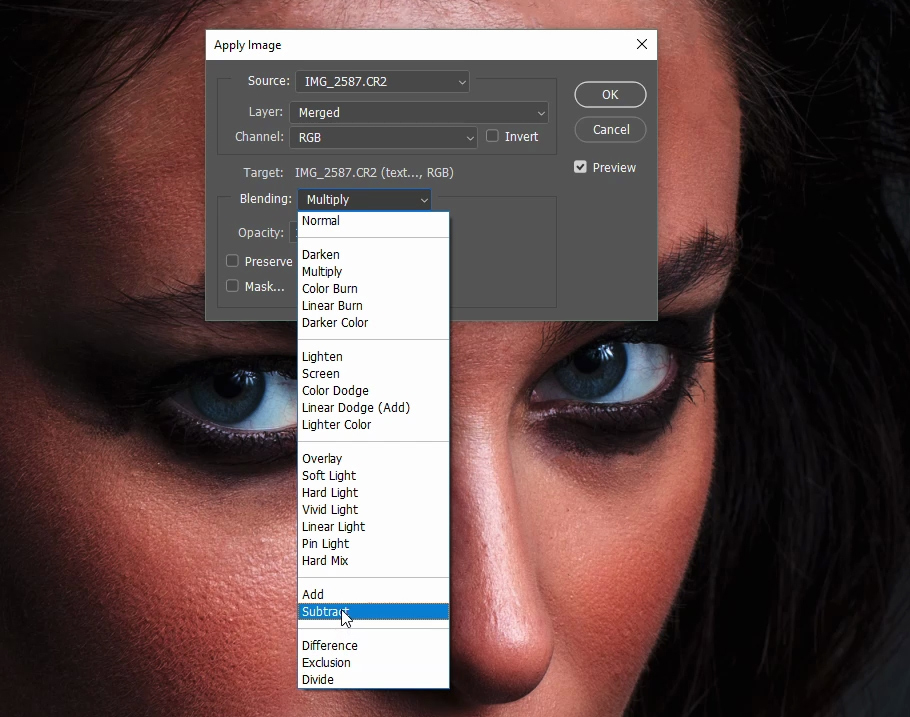
c) Select the Subtract Blending Mode.
d) Select the Layer, go to Color and set the values that are shown below.
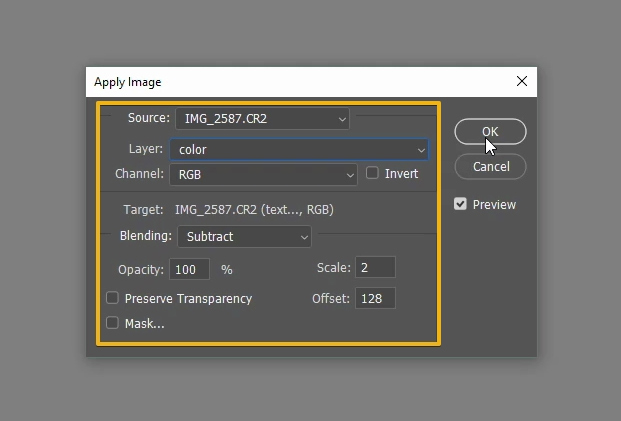
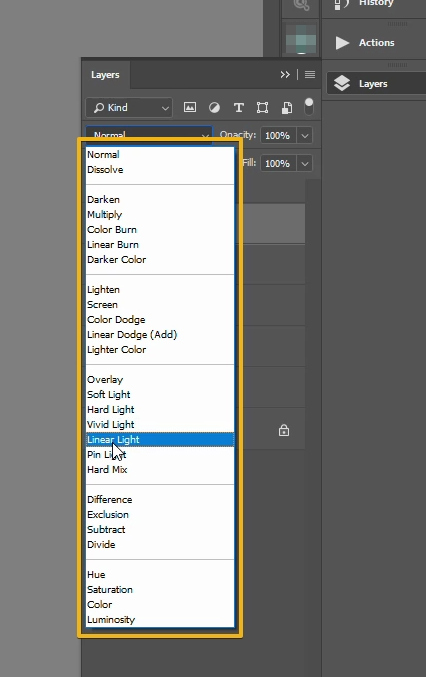
e) Select the Linear Blending Mode.
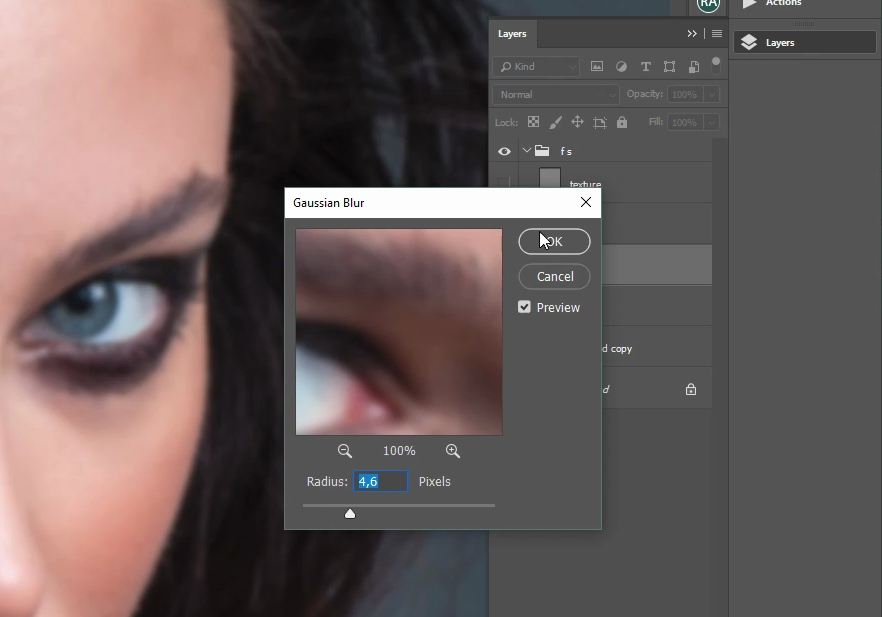
f) Add a Gaussian Blur with a value of 4.6 in the layer with color.
g) Go to the Work layer and choose the Mixer Brush Tool.
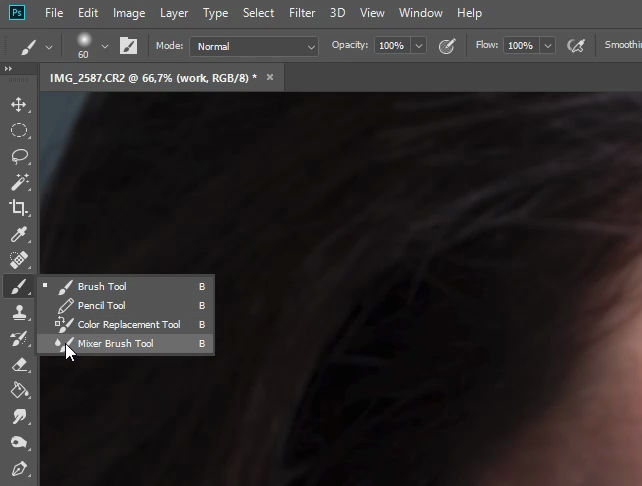
h) Here are the Mixer Brush Tool settings you need to receive.

i) Work with light and dark areas on the face and body to make the skin softer and smoother. Remove the darkest areas and make them softer too, get rid of very bright highlights.
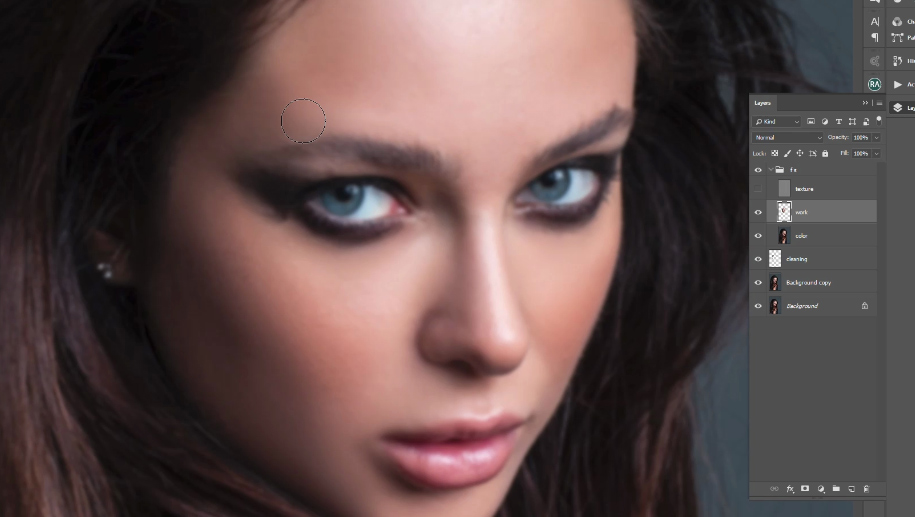
Step 4 > Face Hair Retouching
a) Create a New empty Layer and name it Face Hair. Take the Healing Brush Tool and clean the small hairs on the face, for example, such as on the photo around the lips. Then select the Mixer Brush and if you need, fix the highly visible areas of hairs on the same layer slightly.

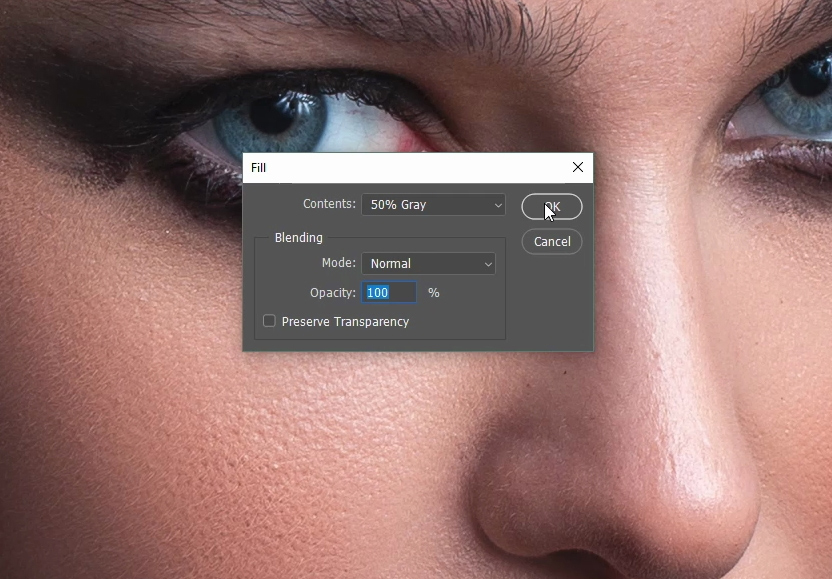
b) Create an artificial skin texture, the empty layer, and fill it with 50% gray.
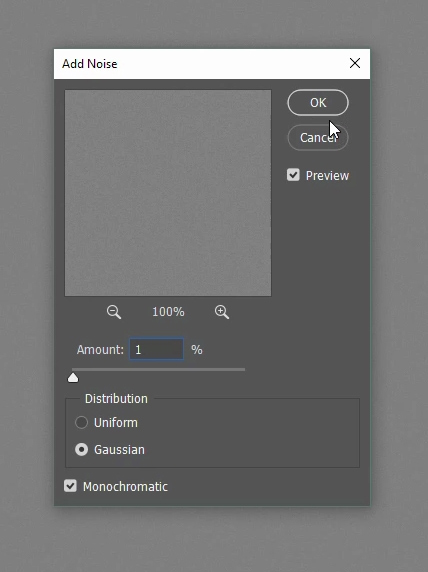
c) Select Filter – Noise > Add Noise. Set the following values.
d) Select Filter > Blur > Gaussian Blur and the values as on the photo below.

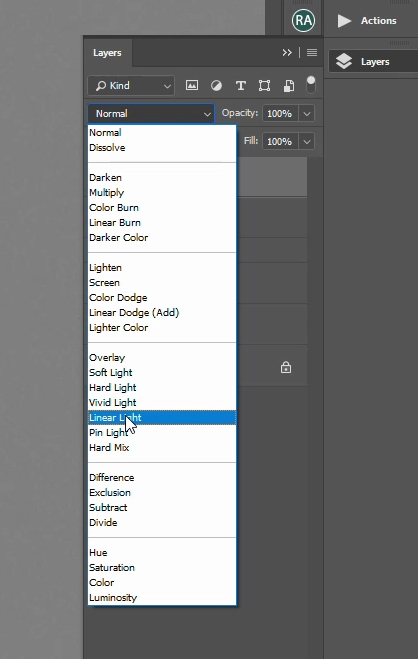
e) Choose the Layer Blending Mode > Linear light and merge it with the Face Hair Layer.
f) Create the empty New Layer, select the Stamp Tool and fix the stray hairs on the eyebrows.

Step 5 > Eyes Retouching
a) Create the empty New Layer, take the Mixer Brush and gently clean the whites of the eyes.

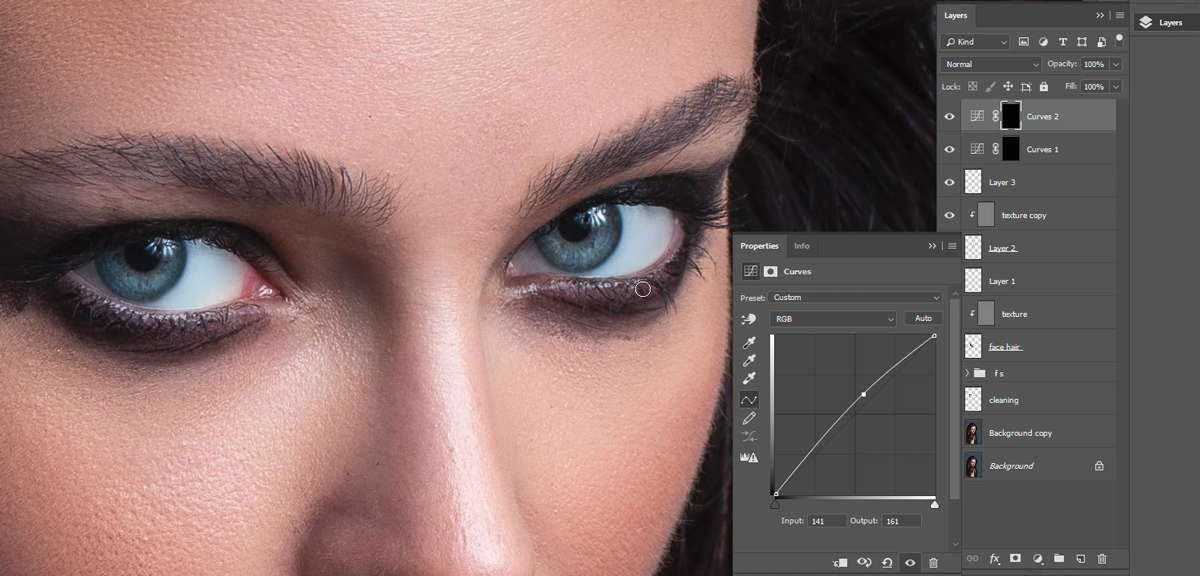
b) Add the Adjustment Layer, adjust the Curves, and darken them like on the screen and set the black mask. Choose the soft white brush and draw the eyes whites to make them more expressive and clear.
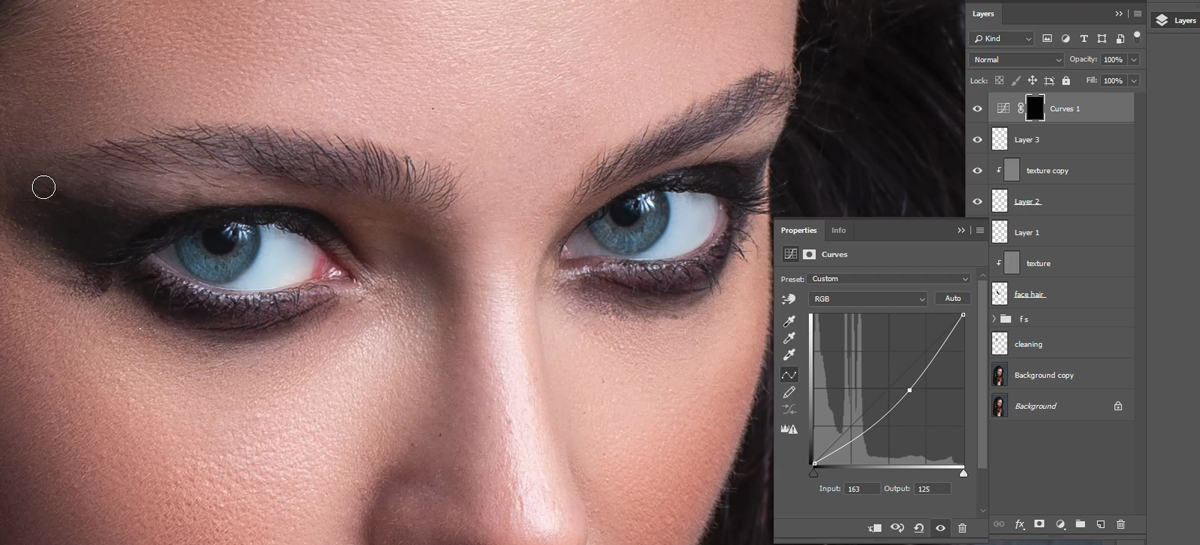
c) Create the Adjustment Layer with Curves, make a black mask and with the help of a white brush draw the eyes whites to make them pop.
Step 6 > Removing Stray Hair from Background
a) Create a New Empty Layer. Take the soft brush, choose the color, which is too close to the background with the help of the Eyedropper Tool. Draw the stray hairs if your background is one colored.
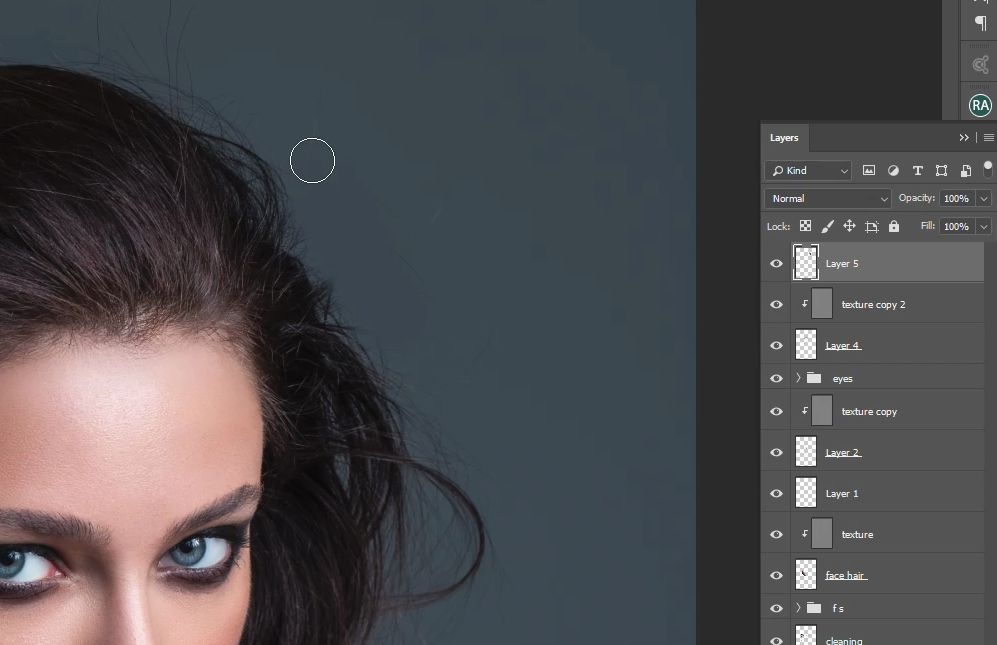
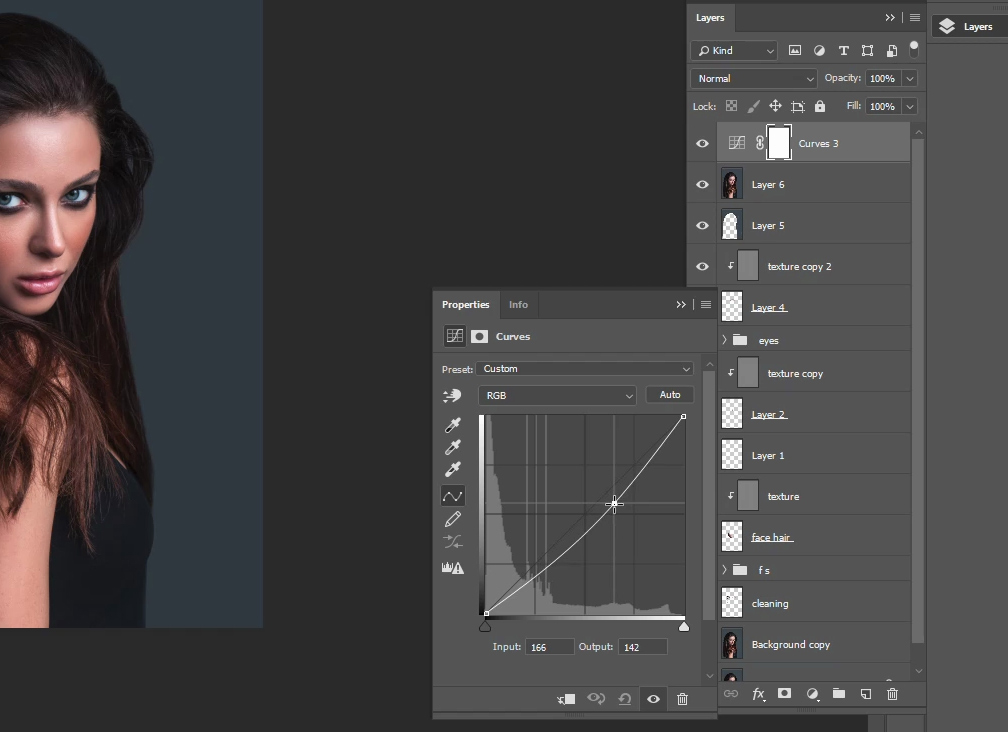
b) Create one more Layer of Curves, change it into the black mask. Select the white brush and darken the edited background to the proper color.
Step 7 > Add Vignette
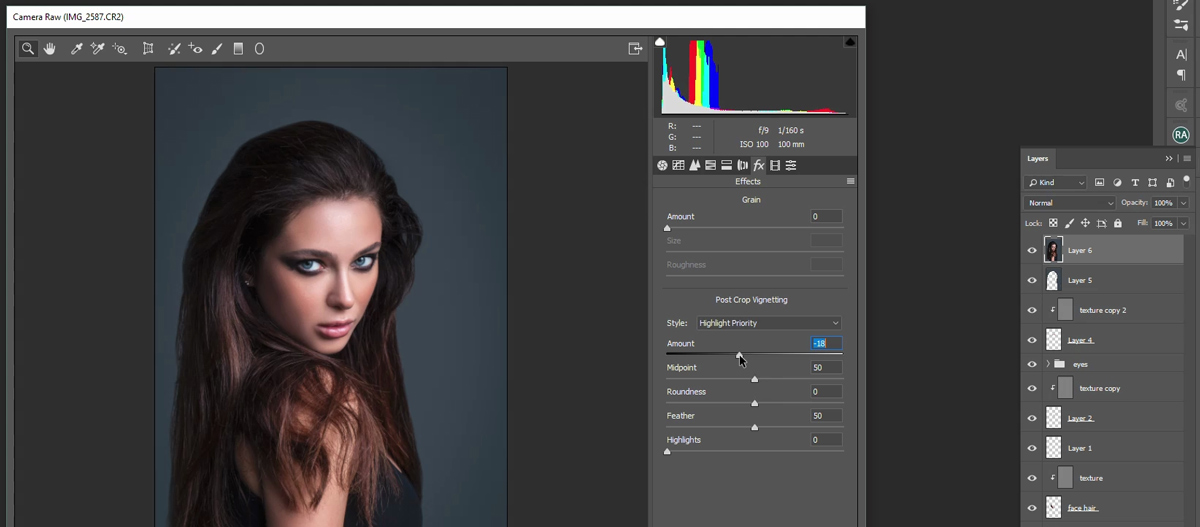
You can add a vignette in order to give the photos some volume through the Camera Raw filter.
Step 8 > Body Correction
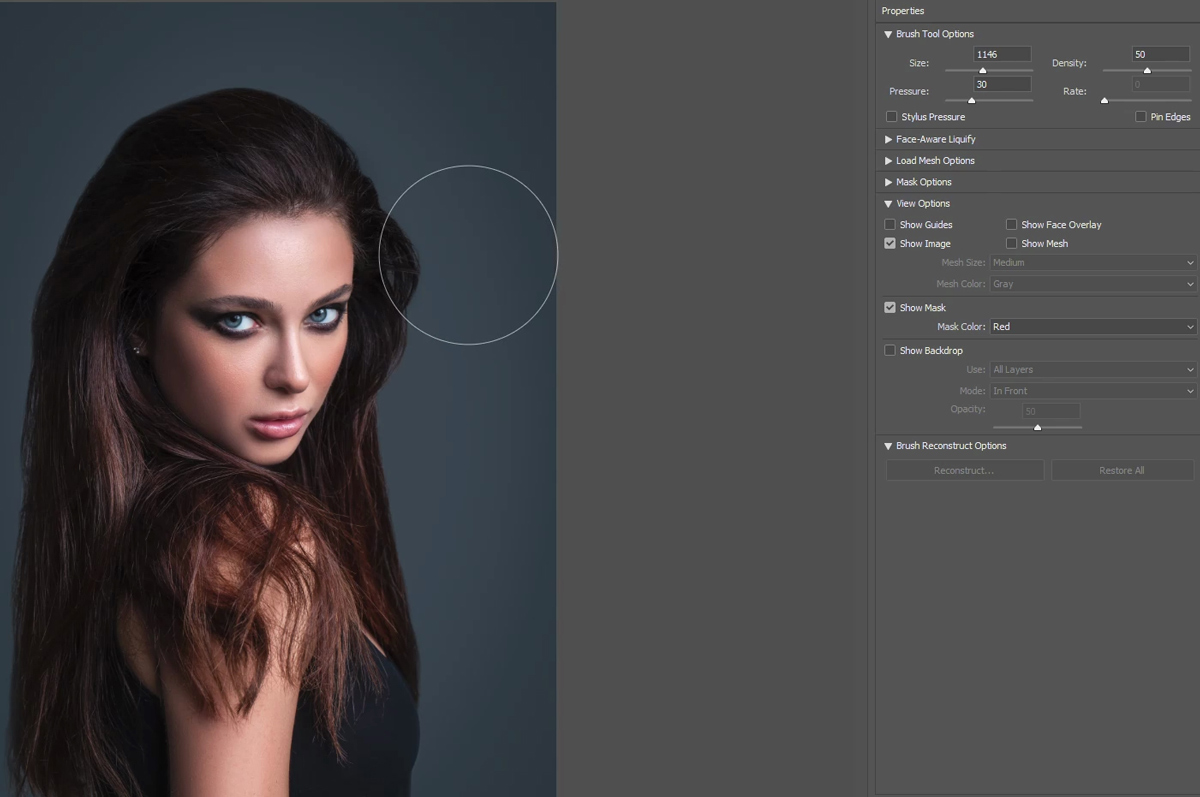
If it is necessary, you can use the Liquify tool to remove the distracting hair and reshape the breast.
Final Work
Here is the final result:

Author: FixThePhoto
A company of the best photo retouchers offers online photo editing services for professional photographers 24x7x365! Visit our website for more Photoshop portrait tutorials.


