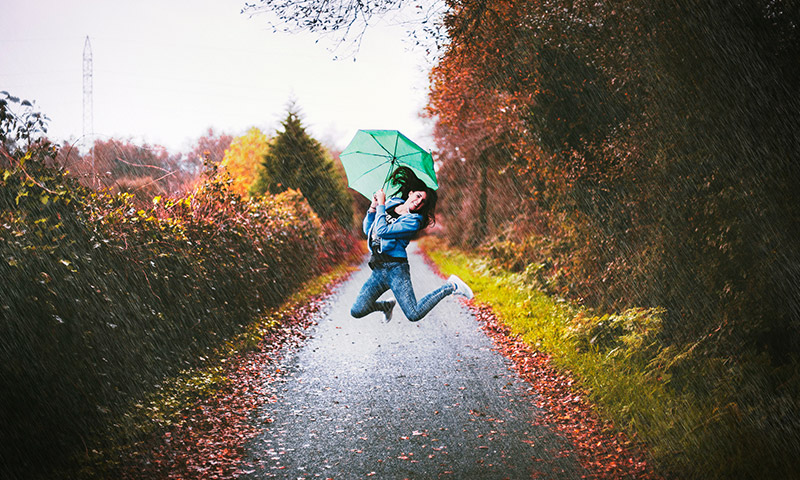
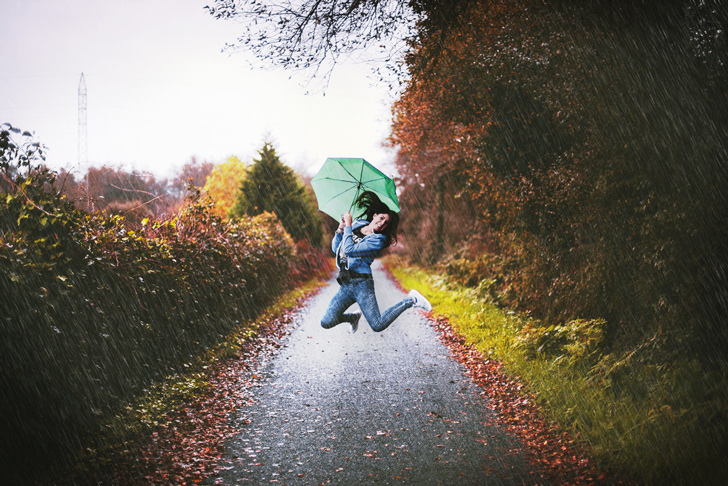
Creating a rain effect in Photoshop can bring a unique and interesting look to an image. With the right knowledge, this task is easy and intuitive. To get started, you must use a suitable dark photo, this ensures you have good results.
To create the rain effect, first, make sure you’re using an image that’s best suited. Then, add a rain layer mask and adjust the rain intensity in various areas of the photo so it looks realistic. Lastly, finish up the rain effect by adding splashes of raindrops for an even more dramatic feel. With just a few easy steps, you’ll have achieved a stunning rain effect in Photoshop.
Tutorial Details
Difficulty: Beginner
Apps Used: Adobe Photoshop
Estimated Completion Time: 5-10′ Minutes
Resources: Girl with umbrella by Angelo
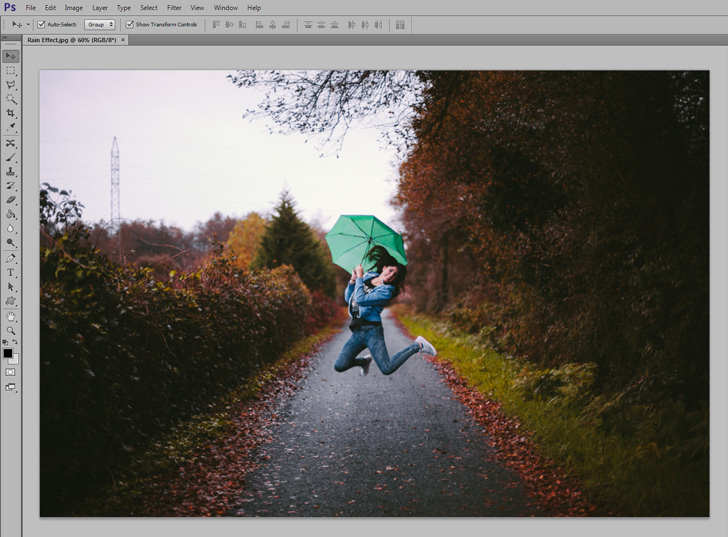
Step 1 > Open the Image
Othen the image you want to edit in Photoshop. I used my example at 1600x 1067px resolution.
Step 2 > Highlights
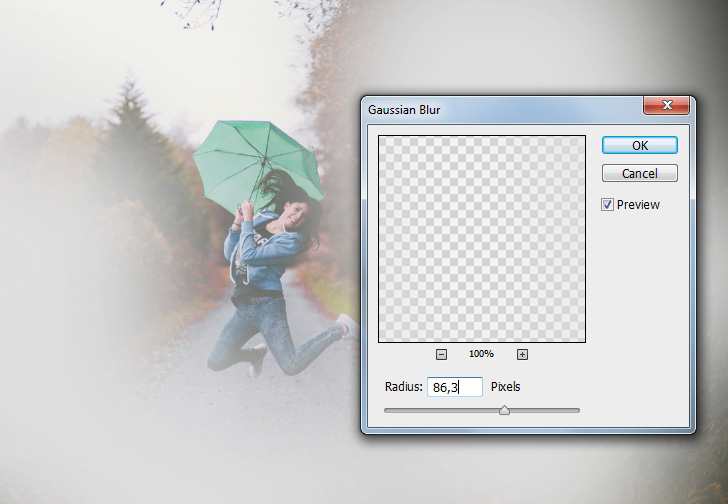
We are going to create a highlight before we add the raindrops. Create a new layer and pick the Brush Tool (B) in your toolbox. Set the brush size to 250px, hardness to 0, and #dfdfdf as color. Paint around the girl like the (image a). Next, go to Filter > Blur > Gaussian Blur and add 86 pixels of Radius. Press OK to confirm and return back. Set the blending mode to Overlay.
Pick a soft grey brush and paint around the girl.
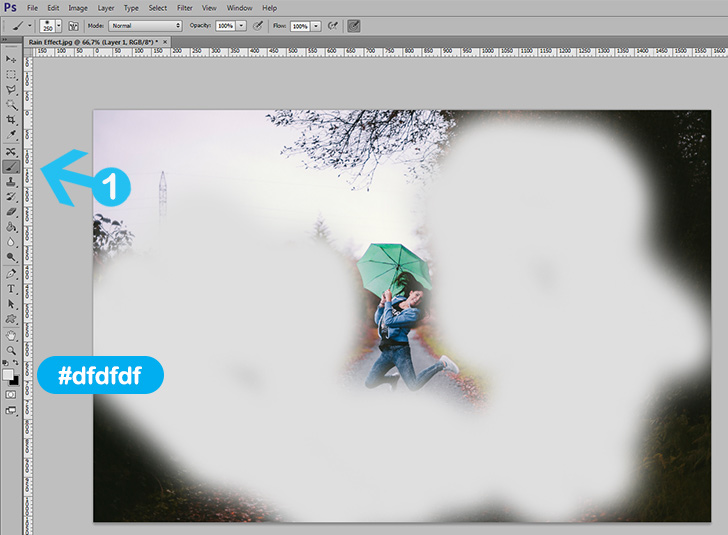
Add Gaussian Blur with 86 pixel Radius and set blending mode to Overlay.
Step 3 > Rain Drops
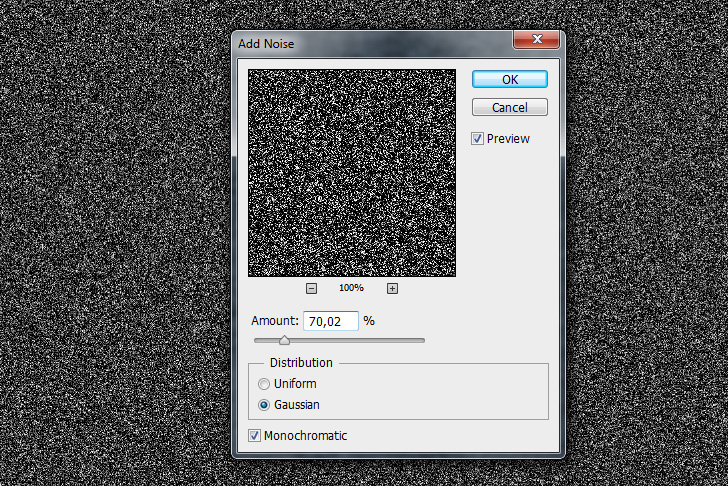
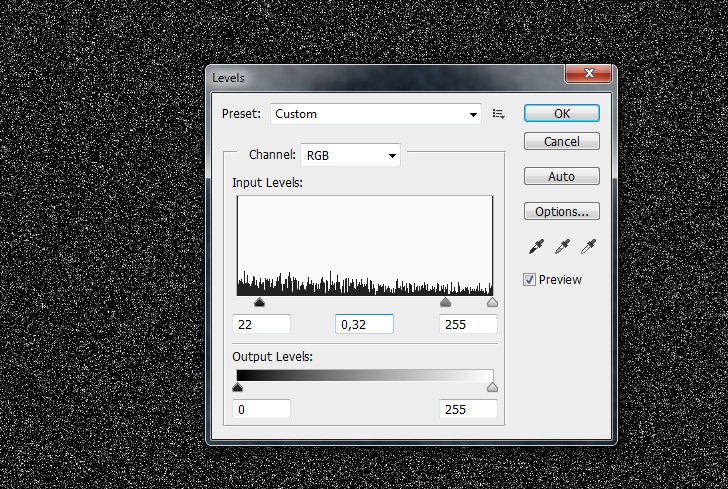
To create the raindrops first create a new layer and rename it “Rain Drops”. Fill the new layer with black color (#000000) using the Paint Bucket Tool (G). Go to Filter > Noise > Add Noise and change the Amount to 70%, Distribution to Gaussian and check the Monochromatic box. Next, go to Image > Adjustment > Levels to add some contrast. Set Midpoints to 0,32 and Shadows to 22 like the image b.
Add noise to 70% Amount.
Add contrast with Levels.
Step 4 > Motion Blur
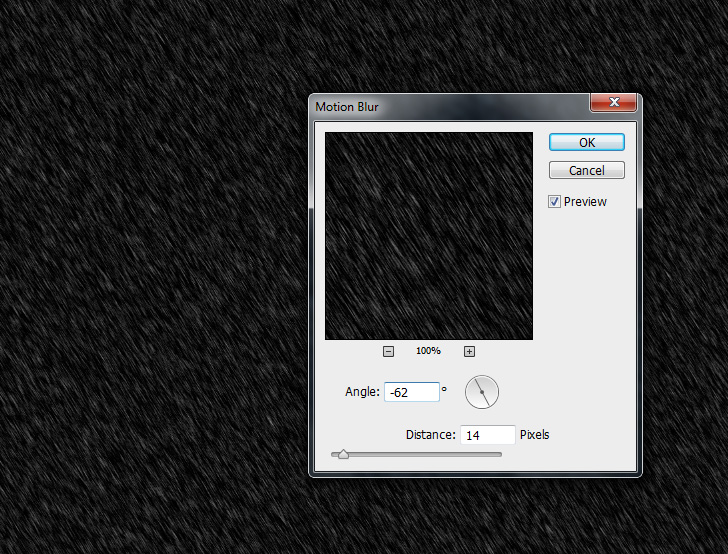
Go to Filter > Blur > Motion Blur and change the Distance to 14 pixels. Set the Angle to -62 and press OK. Change the blending mode to Screen and lower the opacity to 95%.
Step 5 > Intensity
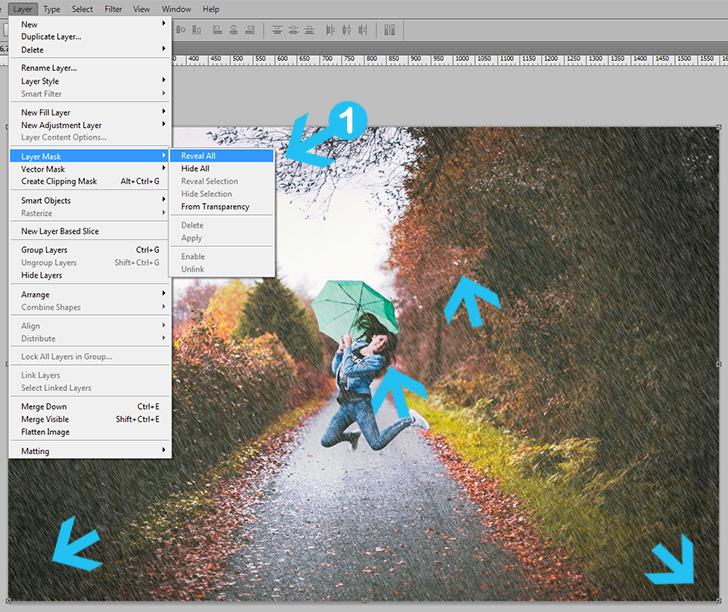
After the motion blur, the rain intensity looks the same around the image. To make the effect more realistic we need to lower the intensity in bright areas. First, go to Layer > Layer Mask > Reveal All to add a layer mask. Pick the Brush Tool (B) with 200-250px size, 30% opacity, and black color. With the layer mask active paint over the bright areas to make them less intense.
Add a layer mask and paint over the bright areas with a black brush.
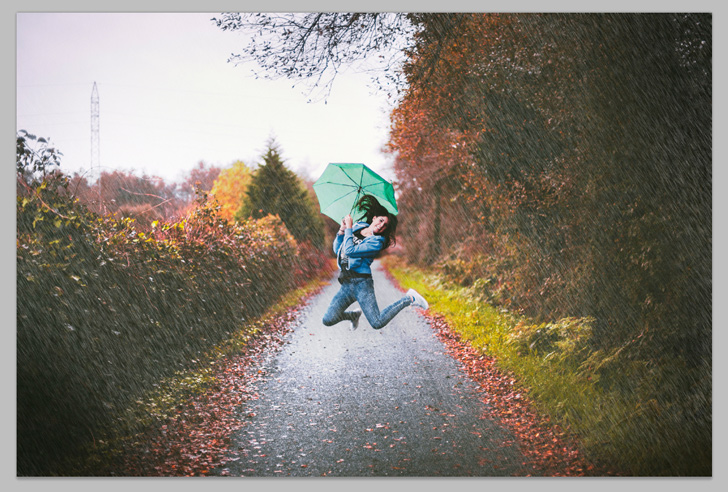
The intensity is not the same anymore.
Step 6 > Contrast
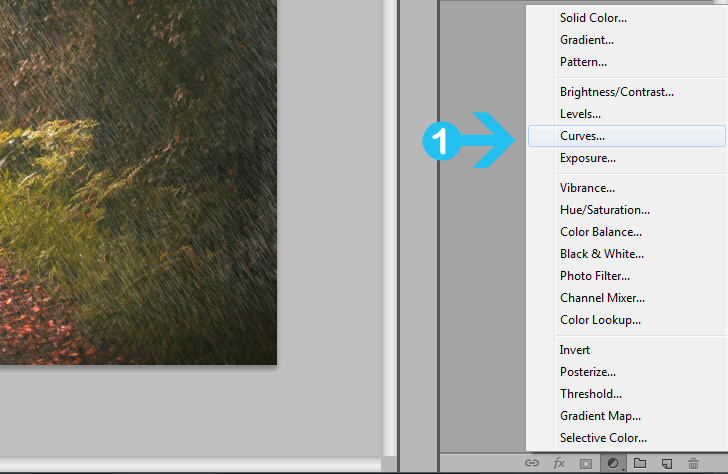
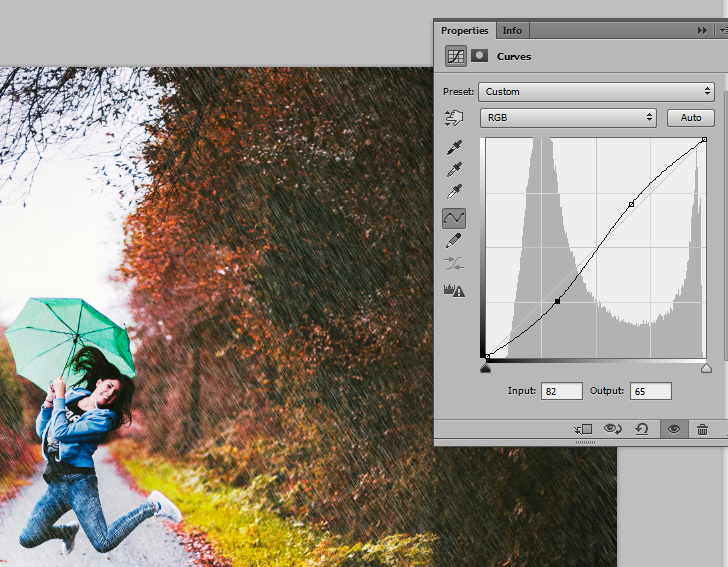
To add some contrast and make the image more appealing add a new Curves Adjustment layer (image a). With the RGB channel active change the line similar to (image b).
Conclusion
Disable the layers to see the difference after every step. Experiment with the angle of motion blur and rain intensity in bright areas. Every image is different so you have to use different settings.
15,000+
Design Assets
- Instant Access
- Free Content Updates
- Constantly Growing Library
- Unlimited Downloads
- Simple Licensing


By Dreamstale
Get creative with our free & premium design resources. Download a vast collection of graphic design materials, such as graphics, sublimation designs, icons, textures, stock photos and more.
Plus get access to Photoshop tutorials & inspirational articles that will spark your imagination.


