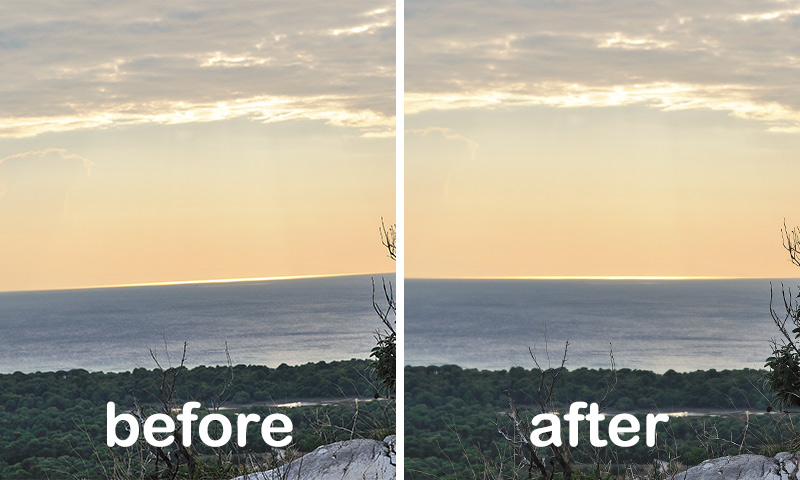
Capturing moments on camera can require making decisions quickly, and one of these is checking the horizon line. By taking a few moments in post-processing to utilize the crop tool and ruler tool in Photoshop, you can easily straighten out an image with a twisted horizon in just a few easy steps.
With a little practice and a few simple tools from Photoshop, you can save time by quickly adjusting the horizon line.
Tutorial Details
Difficulty: Beginner
Apps Used: Adobe Photoshop CS6
Estimated Completion Time: 2′ Minutes
Step 1 > Open the Image
Open the image you want to straighten the horizon.

Step 2 > Use the Crop Tool
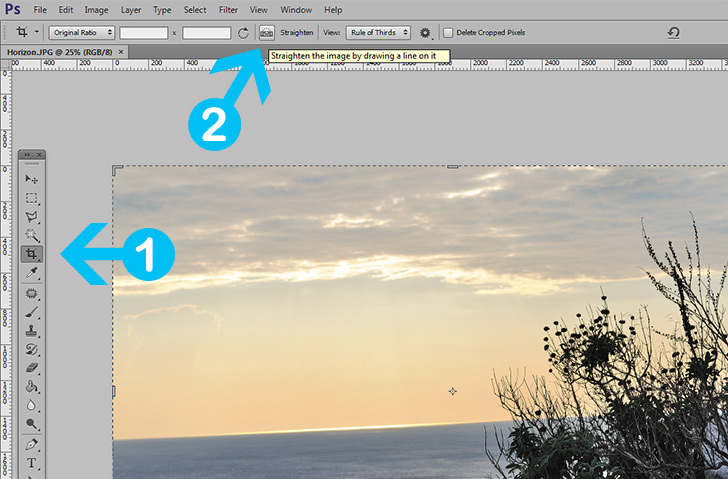
Press the Crop Tool (C) and on the top palette press the “Straighten” button.

Step 3 > Straighten the Horizon
Draw a small line above the horizon and Photoshop will automatically correct the image for you. Confirm or hit OK on your keyboard.

2. The ruler tool technique
For older versions of Photoshop, the crop tool cannot straighten horizons. However, you can use the Ruler Tool. Open the image, press the Ruler Tool (I), draw the line the same as with the crop tool and press “Straighten Layer” on the top palette.
Conclusion

15,000+
Design Assets
- Instant Access
- Free Content Updates
- Constantly Growing Library
- Unlimited Downloads
- Simple Licensing


By Dreamstale
Get creative with our free & premium design resources. Download a vast collection of graphic design materials, such as graphics, sublimation designs, icons, textures, stock photos and more.
Plus get access to Photoshop tutorials & inspirational articles that will spark your imagination.


