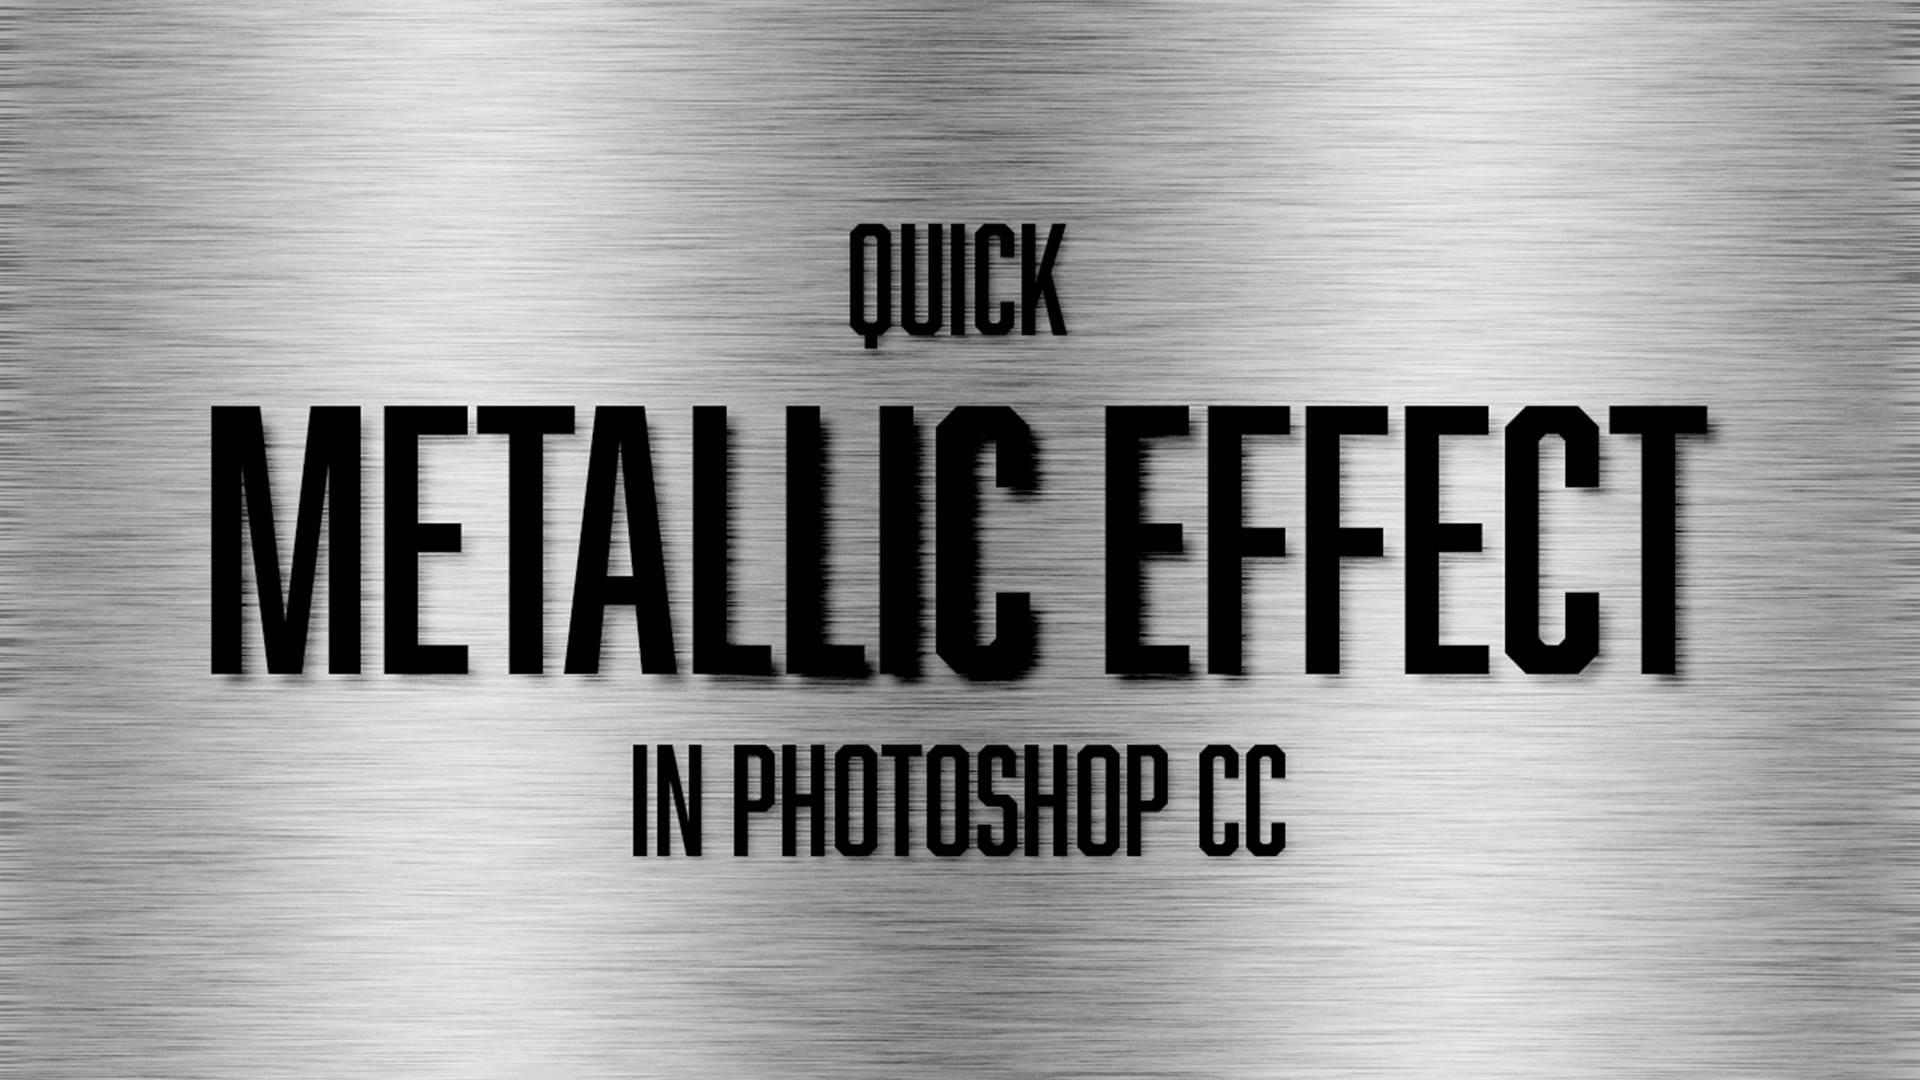
Make your projects shine with Adobe Photoshop. In a few quick clicks, you can bring life to any design with a stunning metal effect in Photoshop. Perfect for wallpaper or giving an extra edge to graphics backgrounds.
With adjustable values depending on image size and dimensions, anyone from beginners to experts will find success crafting their own unique look.
Explore this tutorial now and give your works that extra sparkle.
Tutorial Details
Difficulty: Beginner
Apps: Adobe Photoshop
Estimated Completion Time: 5-10′ Minutes
Watch the video tutorial
Step 1 > Create a Document
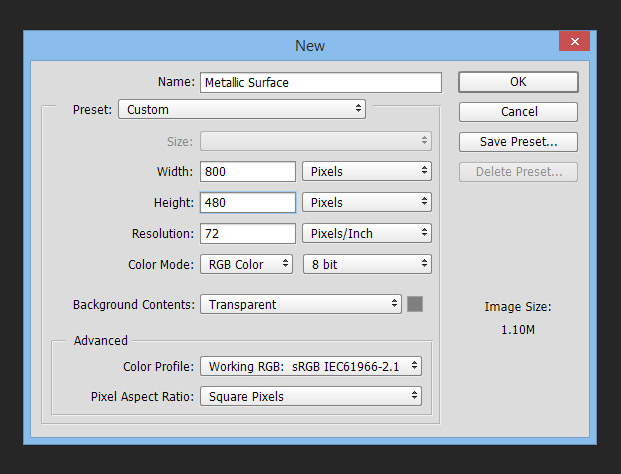
First, run Photoshop and create a new document. For this tutorial my document size is 800x480px.
Step 2 > Gradient Background
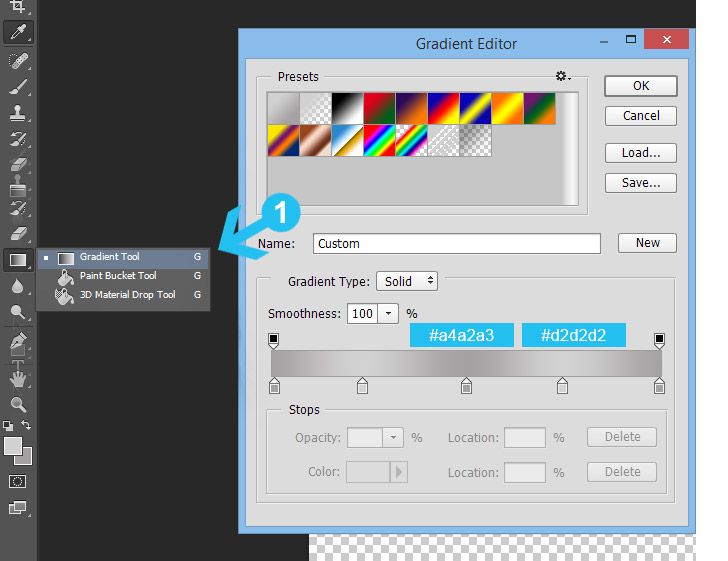
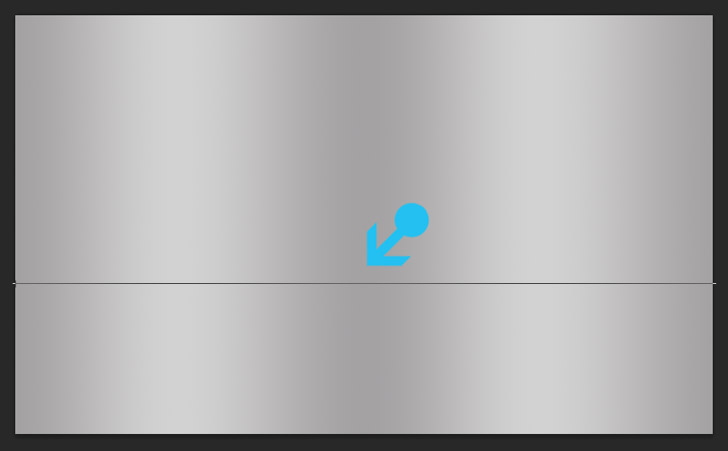
Pick the Gradient Tool (G) in your toolbox and create a 5 point gradient. Use the following colors: #a4a2a3 for the dark color and #d2d2d2 for the highlights. Next, fill horizontally the background.
Gradient Colors
Fill the Background
Step 3 > Metallic Texture
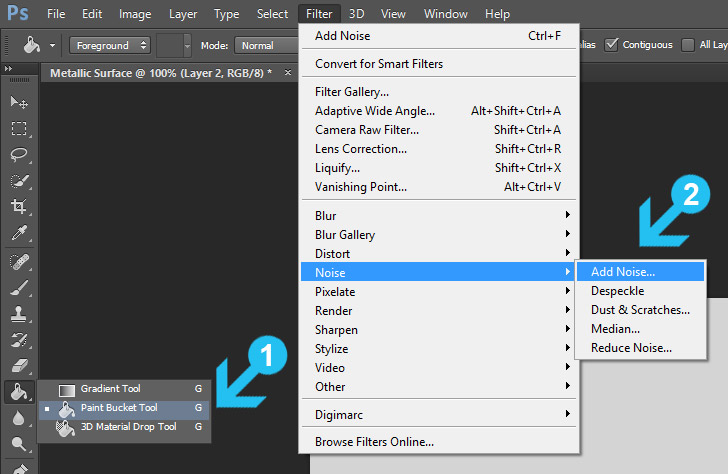
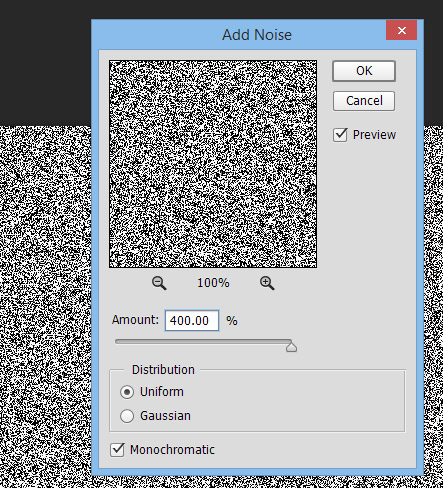
Create a new layer (Shift+Ctrl+N) and fill it with #d2d2d2 color by using the Paint Bucket Tool (G). Next, go to Filter > Noise > Add Noise and increase the amount to 400%, set Distribution to Uniform & check the Monochromatic option.
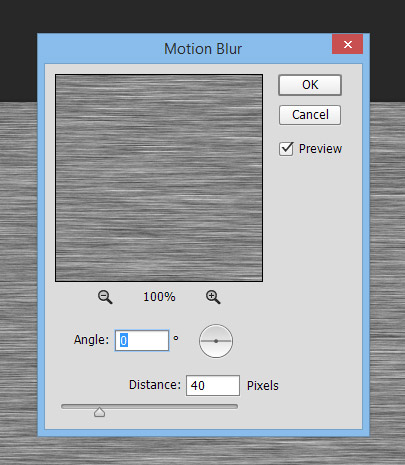
Finally, go to Filter > Blur > Motion Blur and set the Angle to 0 & Distance to 40 pixels (image 3c). Press OK to confirm the filter.
Fill the Background & Add Noise
Noise Settings
Motion Blur Settings
Step 4 > Refine the Texture
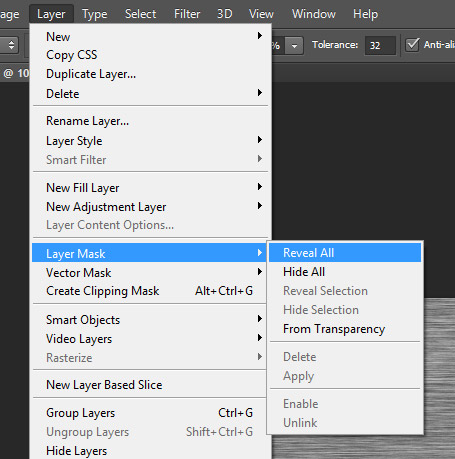
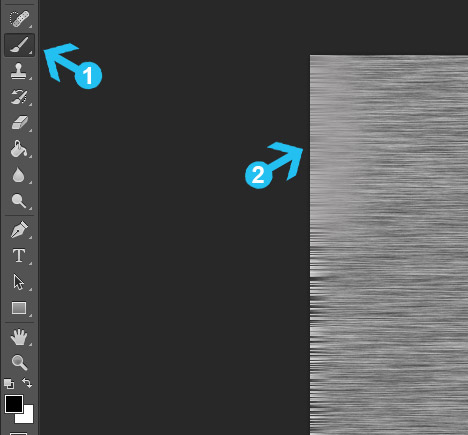
With the texture layer active go to Layer > Layer Mask > Reveal All to add a layer mask. Change the Foreground color to black (#000000) and pick a large soft brush by using the Brush Tool (B) in your toolbox. Lower the brush opacity to 65-70% and draw over the mask in left and right corners.
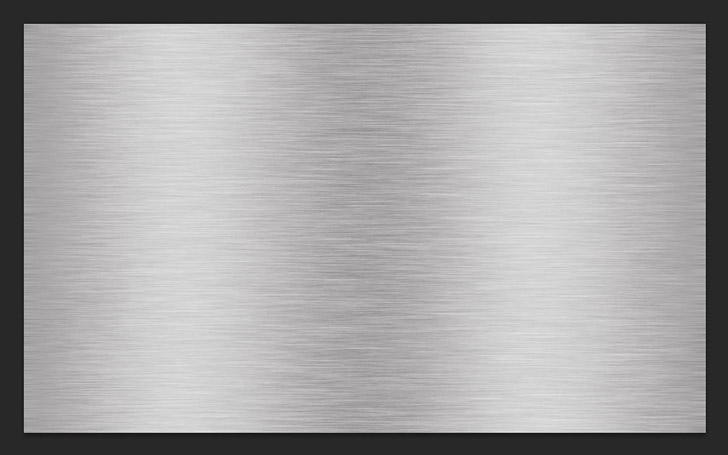
Next, set the Layer Blending Mode to Overlay and Opacity to 60% .
Add Layer Mask
Draw around the left & right corners with 70% visible soft brush
Result
Step 5> Add Noise
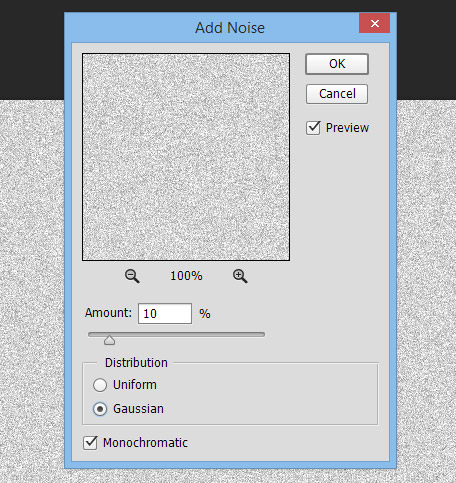
Create another layer and fill it again with #d2d2d2 color by using the Paint Bucket Tool (B). Go to Filter > Noise > Add Noise to add noise with 10% Amount, Gaussian Distribution & Monochromatic effect. Next, change the layer blending mode to Linear Burn and opacity to 10%.
Add Noise
Step 6> Curves
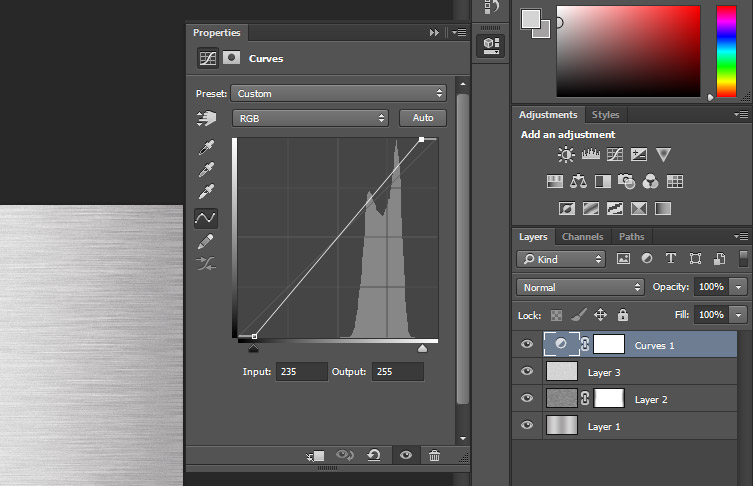
To make the image more intense and appealing go to Layer > New Adjustment Layer > Curves. Move the shadows pointer to the right side and the highlights pointer to the left side.
If the Curves tab is not visible or you can find it simply by double-clicking the Curves layer icon on the Layers panel.
Curves Settings
Final Work
Simple, fast and cool metallic effect. Change the background gradient direction for a different effect.
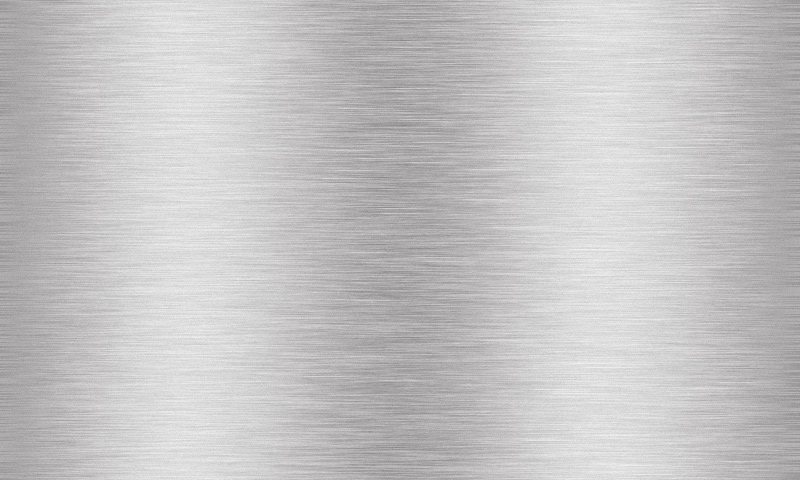
Download Free Metal Texture
Download Size: 1.1mb
Download File: Jpg
Png Res: 1920 x 1080px
Author: Dreamstale
Promotion is always appreciated, but please send people to this page.
15,000+
Design Assets
- Instant Access
- Free Content Updates
- Constantly Growing Library
- Unlimited Downloads
- Simple Licensing

By Dreamstale
Get creative with our free & premium design resources. Download a vast collection of graphic design materials, such as graphics, sublimation designs, icons, textures, stock photos and more.
Plus get access to Photoshop tutorials & inspirational articles that will spark your imagination.


