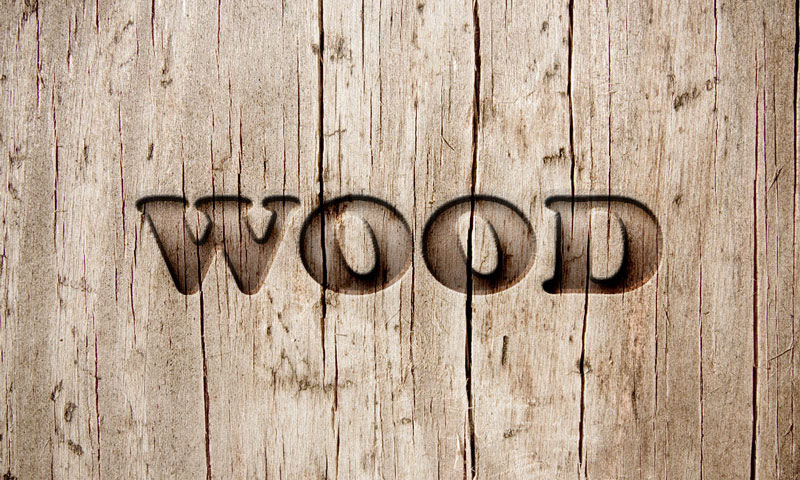
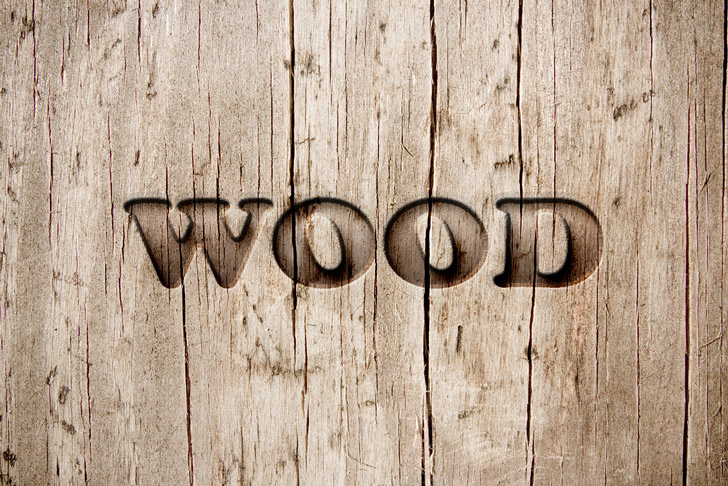
In this quick Photoshop tutorial, we’ll learn how to create a quick wood text effect in Photoshop. We are going to change only the blending option in our text. You can use the same technique for other textures. Keep in mind that you have to change the values for different image resolutions and textures.
Tutorial Details
Difficulty: Beginner
Apps: Adobe Photoshop
Estimated Completion Time: 10-15′ Minutes
Resources: Wood Texture by SophieG*
Step 1 > Import the Texture
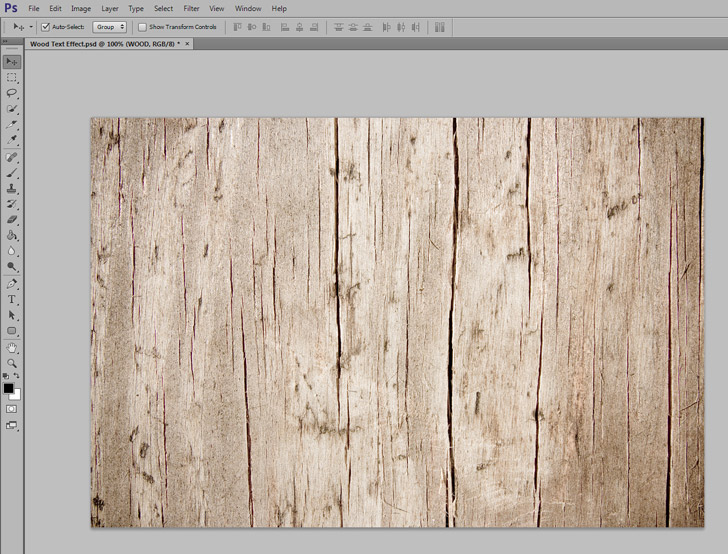
First, open the texture you want in Photoshop. For this tutorial, my image resolution is 1024 x 683 pixels.
Step 2 > Add Some Text
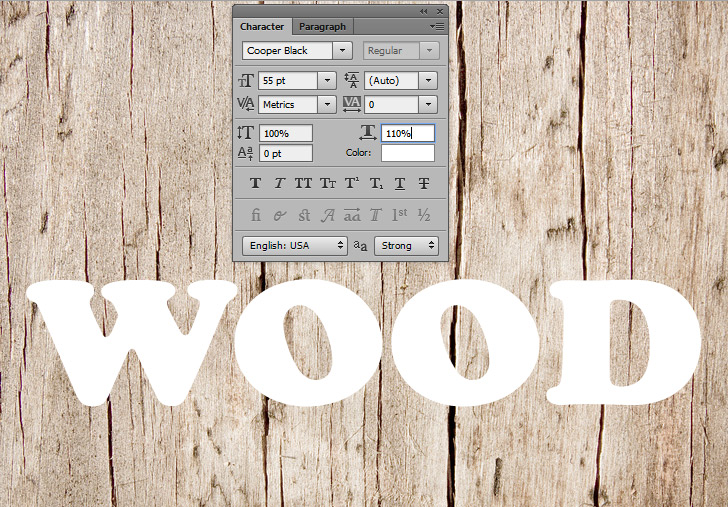
Write anything you want over the texture. Just pick the Text Tool (T) on your toolbox. I used a Cooper Black font with a 55pt font size. You can use any font you like but for wood textures, a bold rounded font is recommended. Also, the colour of your text is not important.
Step 3 > Blending Options
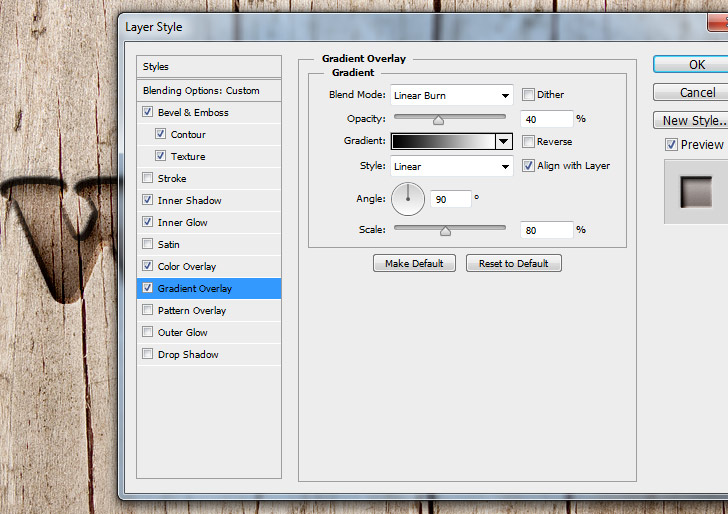
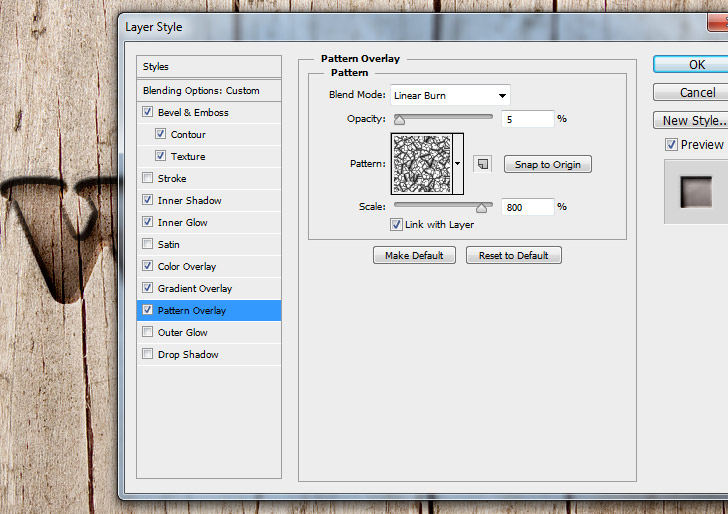
The final and magic step is to change the blending options of the text. If your image resolution is different then you may have to experiment with higher or lower values to achieve the same effect. To change the blending options go to Layer > Layer Style > Blending Options and use these values:
Change Fill Opacity to 0%
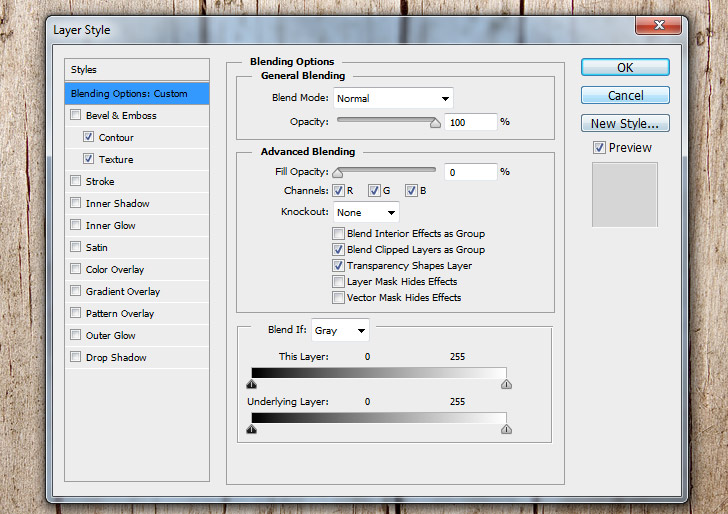
Bevel & Emboss
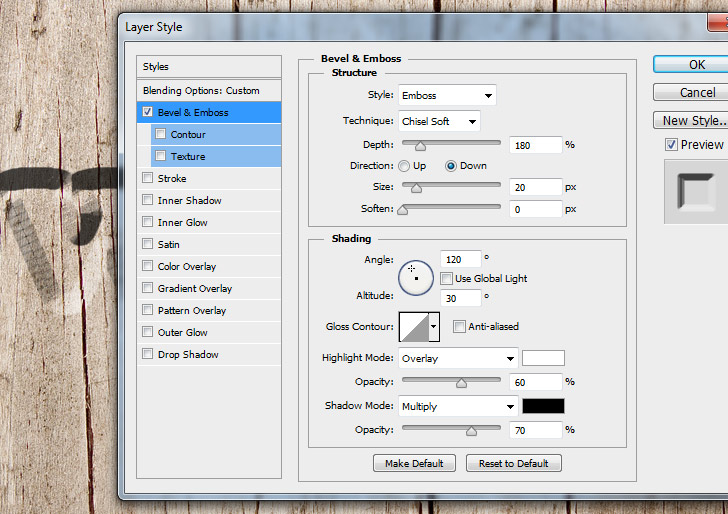
Contour: Cove – Deep Element

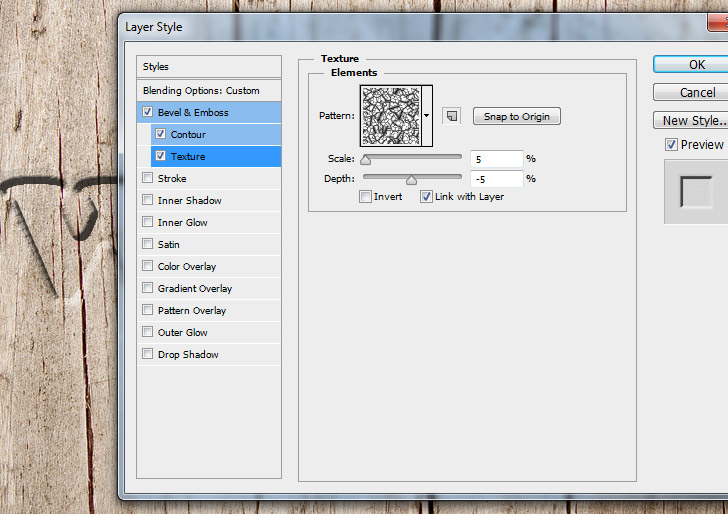
Texture: Metal Landscape Pattern
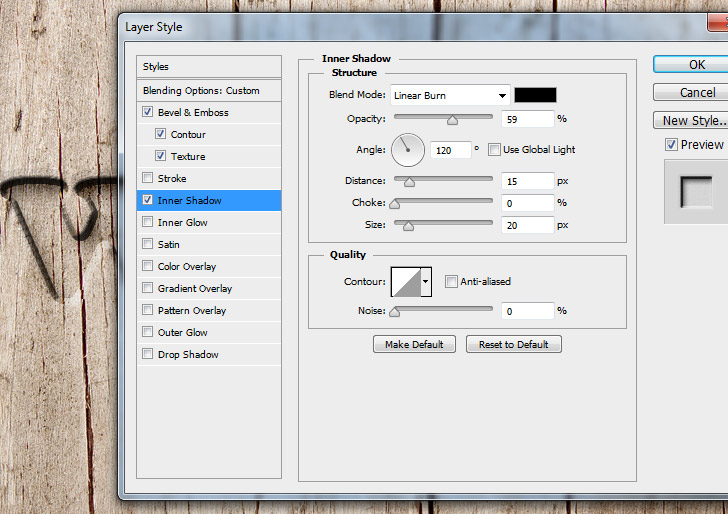
Inner Shadow
Inner Glow

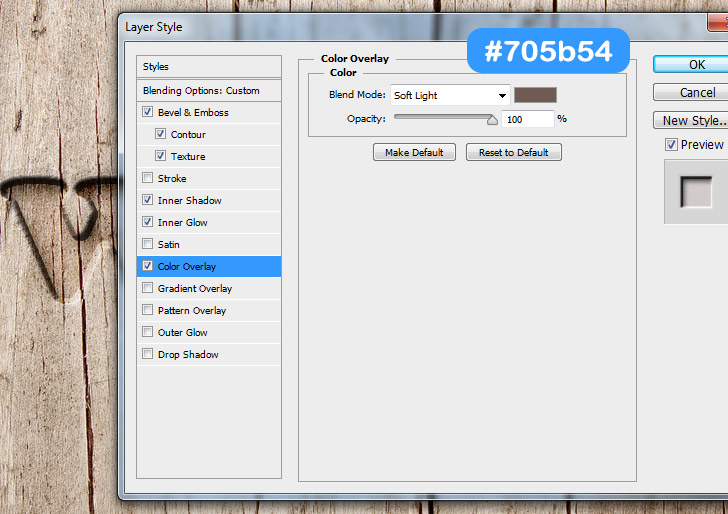
Color Overlay
Gradient Overlay
Pattern Overlay
Outer Glow

Conclusion
Bevel & Emboss Shading is the most important part. You can change the overall look by changing the highlights and shadow settings.
The best about this technique is that you can save it in a Photoshop Action for later.
15,000+
Design Assets
- Instant Access
- Free Content Updates
- Constantly Growing Library
- Unlimited Downloads
- Simple Licensing

By Dreamstale
Get creative with our free & premium design resources. Download a vast collection of graphic design materials, such as graphics, sublimation designs, icons, textures, stock photos and more.
Plus get access to Photoshop tutorials & inspirational articles that will spark your imagination.


