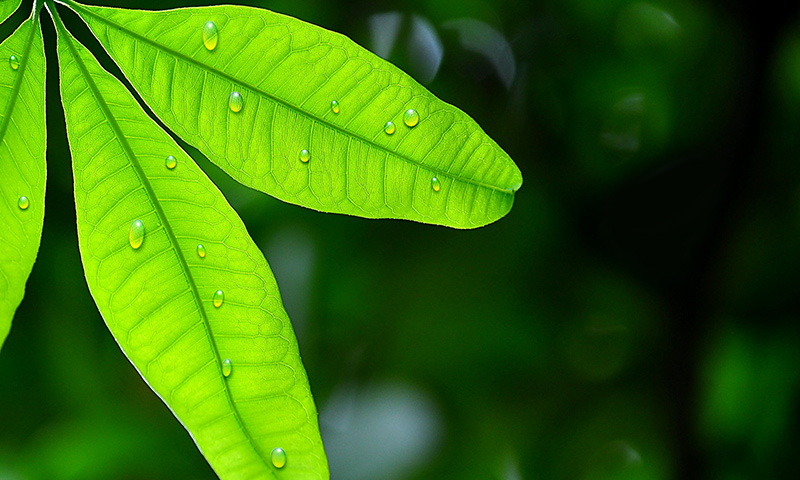
Learn how to add realistic water drops in Photoshop
Water drops are one of the most popular image effects and can be used to make a variety of different objects look more realistic. Thanks to this Photoshop tutorial, it’s now easier than ever to create realistic water drops. All you need to do is create shapes, then change the blending options, it’s that simple.
This method can be applied to leaves, metal surfaces, glass, and anything else you can think of. Now let’s dive into each step and see how we can get realistic water drops in no time.
Step 1 > Open the Image
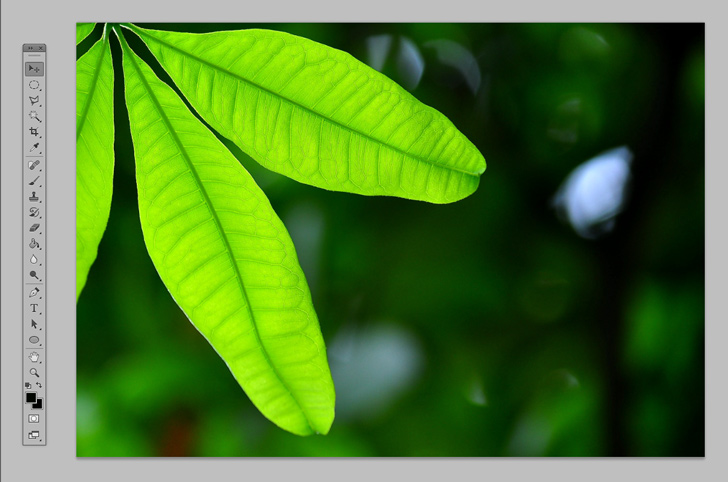
Open the image you want to add water drops. For this tutorial, i used a green leaf but you can use metals, glass, and other similar surfaces.
Step 2 > Create the shape
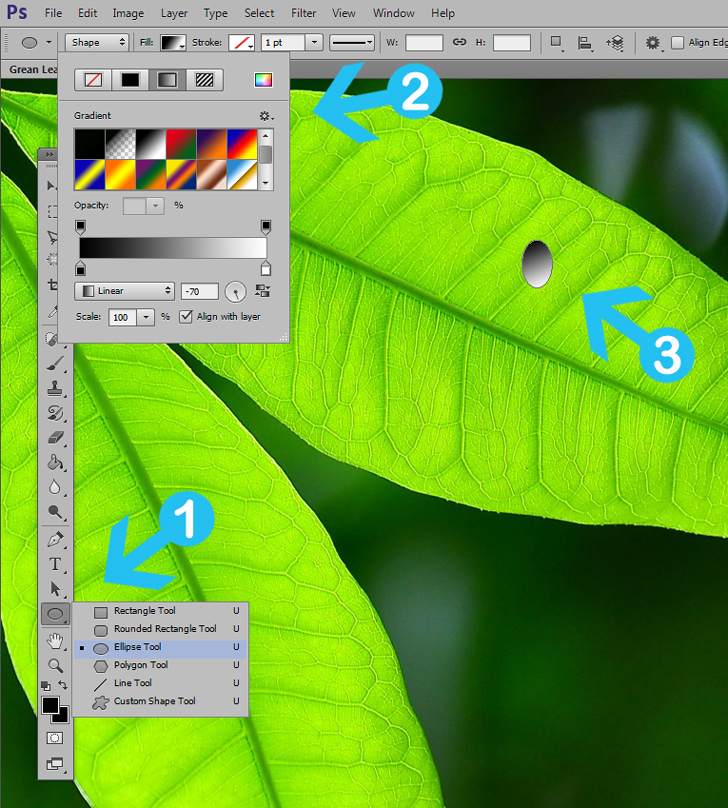
First, create a new layer by going to Layer > New > Layer (Shift Ctrl + N) and name it “Water Drops”. Pick the Ellipse Tool (U) and fill it with black to white gradient and a -70 Angle. Finally, change the blending mode to Overlay.
Step 2 > Blending options
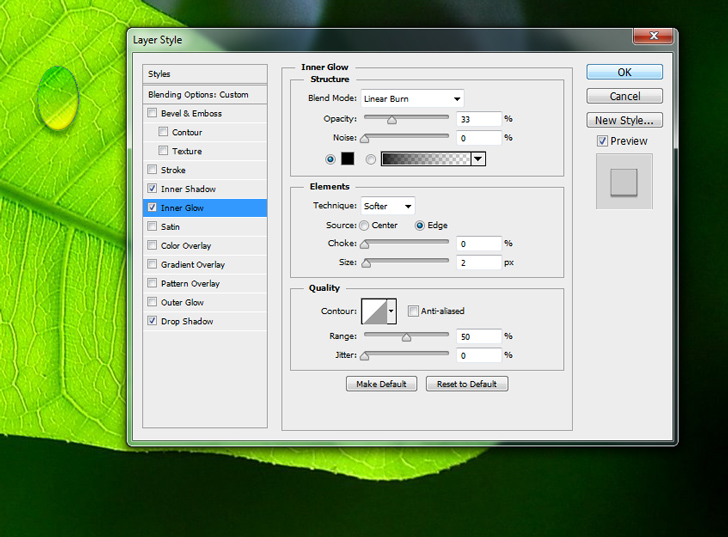
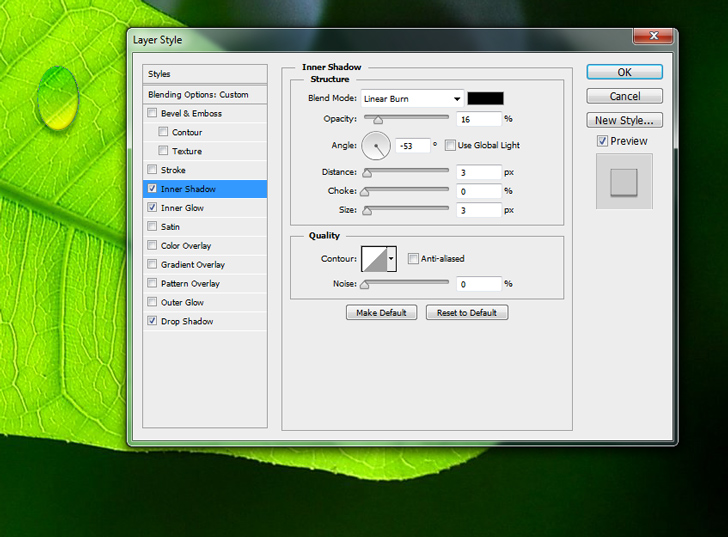
Right-click on the water drops layer and press “Blending Options” in the new tab add the following values:
Drop Shadow: blending mode = linear burn, opacity = 32, angle = 90, distance = 8, spread = 0, size = 6.

Inner Glow: blending mode = linear burn, opacity = 33, noise = 0, choke = 0, size = 2.
Inner Shadow: blending mode = linear burn, opacity = 16, angle = -53, distance = 3, size = 3 and press OK.
Step 3 > Add Highlights
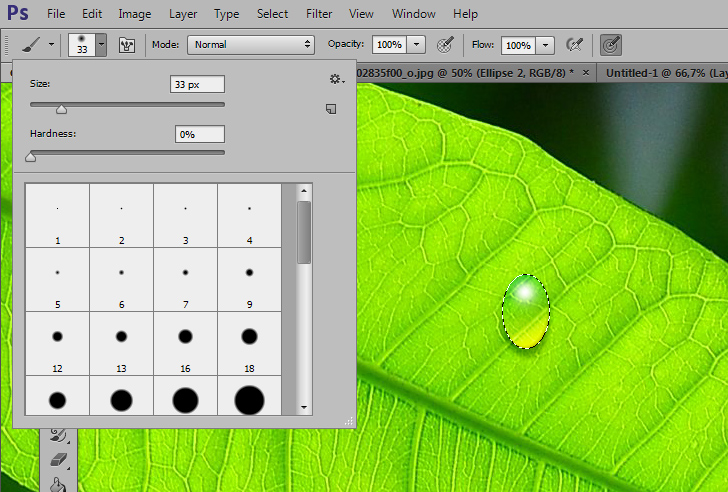
Ctrl + click on the Water Drop layer to select it and create a new layer with the name “Highlight 1”. Pick a small soft white brush with size 33px and draw on top of the selection. Change the blending mode to Overlay.
Step 4 > Add another highlight
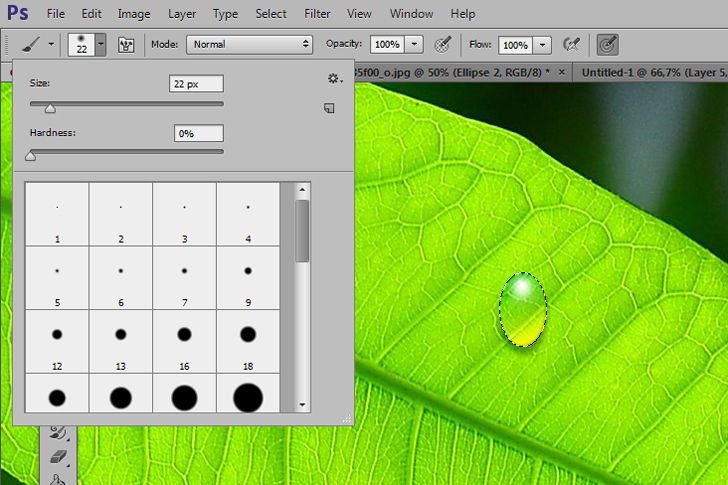
With the water drop selection still active create another layer and name it “Highlight 2” With a smaller brush add another white dot with a size of 22px and 0 hardness. Press (Ctrl + D) to deselect. Your water drop is almost ready.
Step 5 > Group layers
Press (Shift) and select Water Drop, Highlight 1, and Highlight 2 layers. Press (Ctrl + G) to group them. Rename the Group 1 to Water Drop 1.
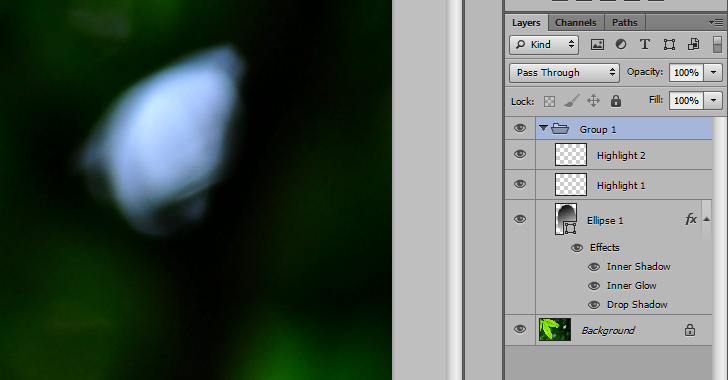
Step 6 > Add more drops
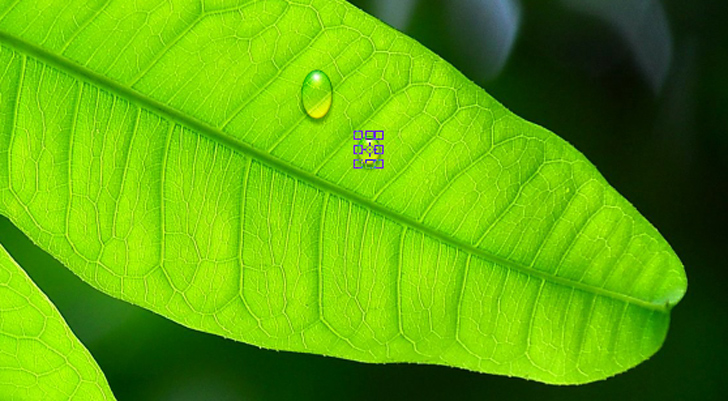
Duplicate the “Water Drop 1” group and transform it by pressing (Ctrl + T). Move the new group and repeat the same process to create the water drops.
Conclusion
To make an image look more realistic, it is important to create variation in the water drops. Try creating different sized drops, adding a range of highlights and shadows, and using light to add impact. These techniques can be used alone or combined with other effects to create interesting reflections.
Pay attention to the direction of light within the image and remember that certain shapes may need more than one highlight source for greater realism.
Taking the extra time to adjust and edit details like these can add a tremendous amount of visual appeal for viewers that will get noticed every time.

15,000+
Design Assets
- Instant Access
- Free Content Updates
- Constantly Growing Library
- Unlimited Downloads
- Simple Licensing


By Dreamstale
Get creative with our free & premium design resources. Download a vast collection of graphic design materials, such as graphics, sublimation designs, icons, textures, stock photos and more.
Plus get access to Photoshop tutorials & inspirational articles that will spark your imagination.


