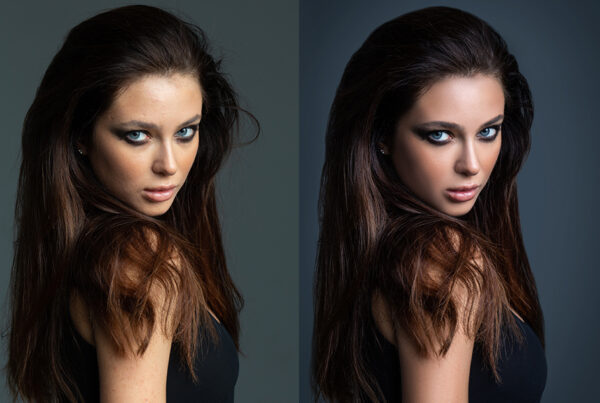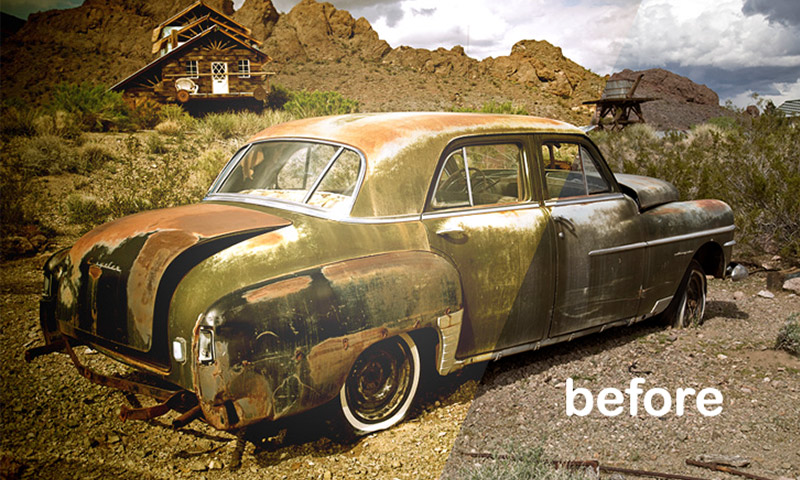
The Lomo effect is a sought-after photographic look, characterized by over-saturated colors, high contrast, and a strong vignette. It was made famous by the original Lomo LC-A camera in the early 1980s but remains popular to this day. This tutorial equips you with the skills to create an image that replicates the distinctive Lomo style. Learn how to ensure your colors pop and take advantage of complimentary hue adjustments to create an eye-catching, unique photo.
Whether you’re looking to replicate those classic analog film effects or just want an exciting new way to make your photos stand out from the crowd, learning how to produce the Lomo effect is sure to open up unlimited creative possibilities.
Tutorial Details
Difficulty: Beginner
Apps Used: Adobe Photoshop
Estimated Completion Time: 10-15′ Minutes
Resources: 1950 Chrysler by Curtis
Step 1 > Open the image
First, open the image you want to use. For this tutorial, I used the abandoned old car but you can use any image you like.
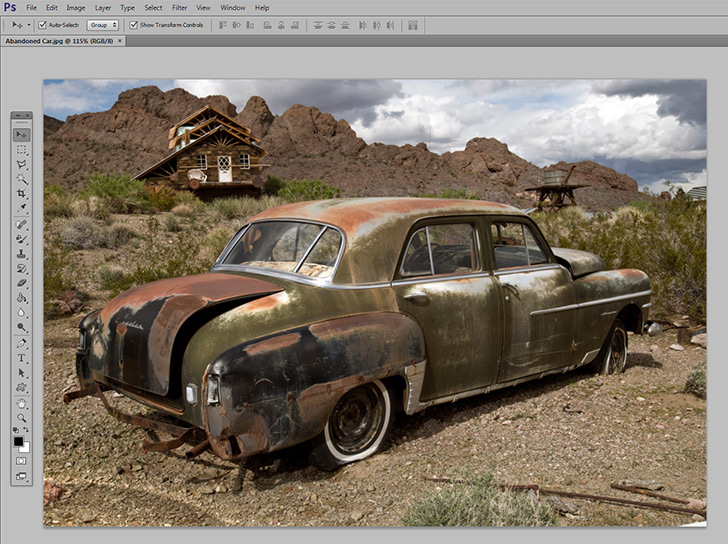
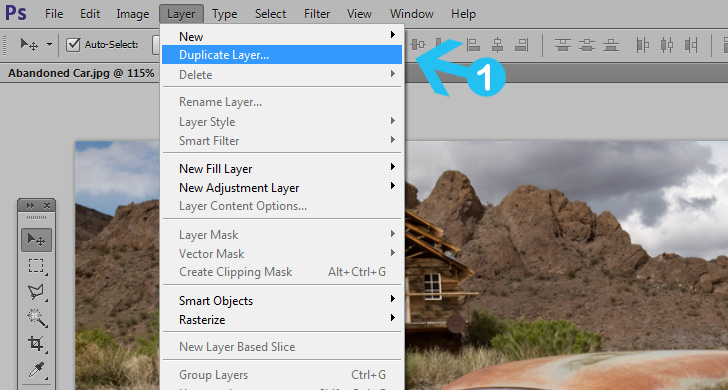
Step 2 > Duplicate the layer
Duplicate the layer and name the new one “Lomo Effect”.
Step 3 > Add vignette
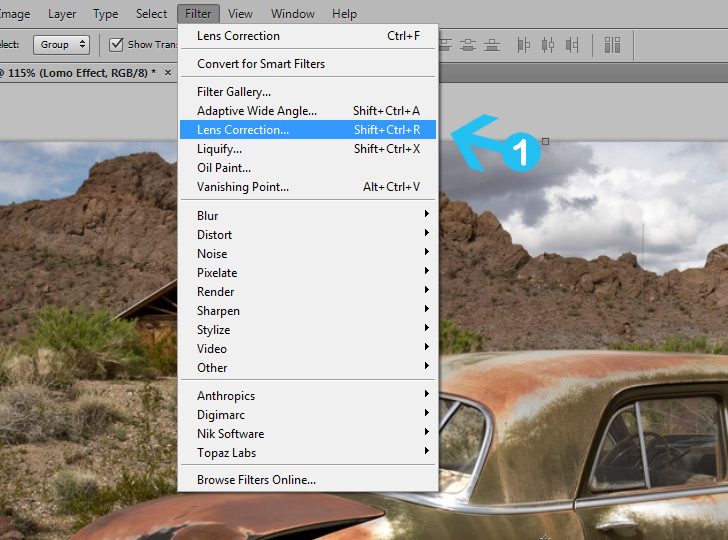
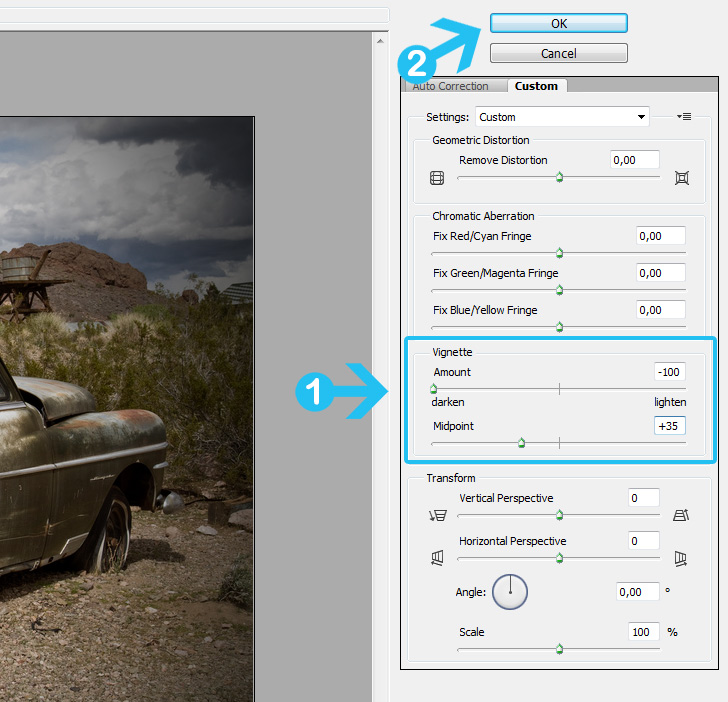
We need to add a strong vignette and an easy method is to go to Filter > Lens Correction, in the new window select the custom tab, and change the Vignette Amount to -100 and Midpoint to 35. Press OK to finish this step.
Step 4 > Create a curves adjustment layer
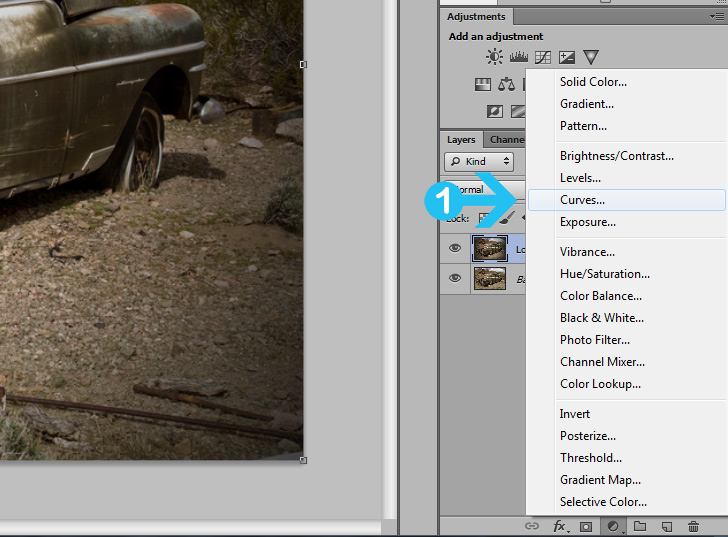
To create the Lomo effect we need to adjust the color tones. Press the “Create new fill or adjustment layer” button at the bottom of the layers palette.
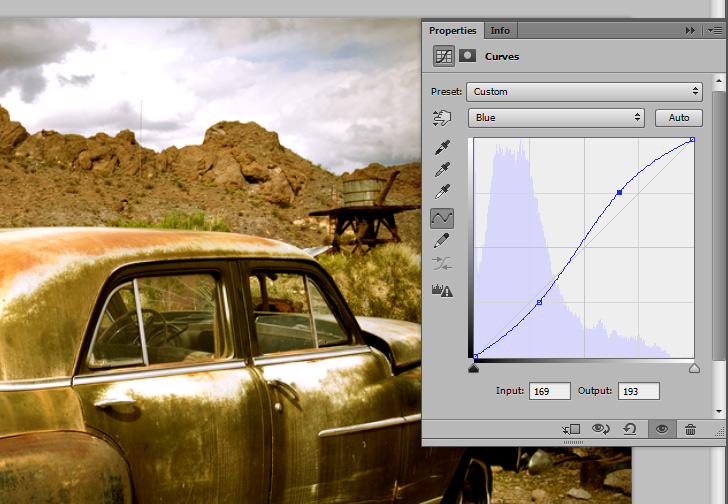
Step 5 > Change color tones
For different images, you can use different settings but for this example, I used the following settings:
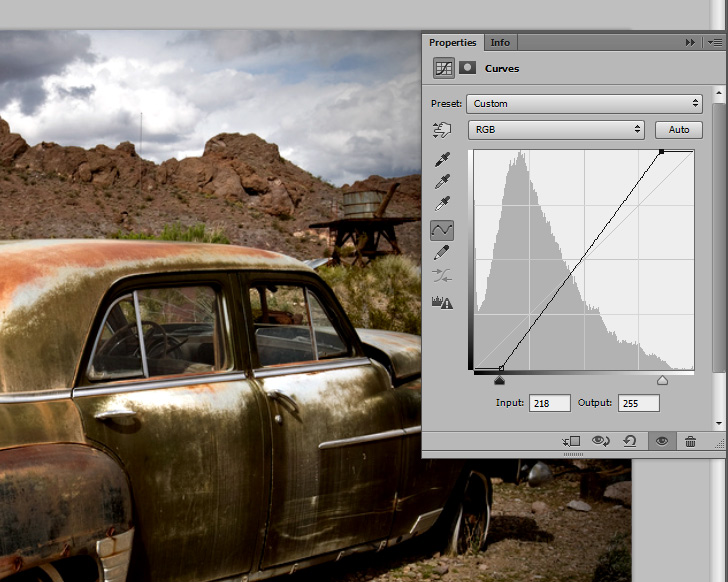
Add more contrast using the RGB channel and make it look similar to my example.
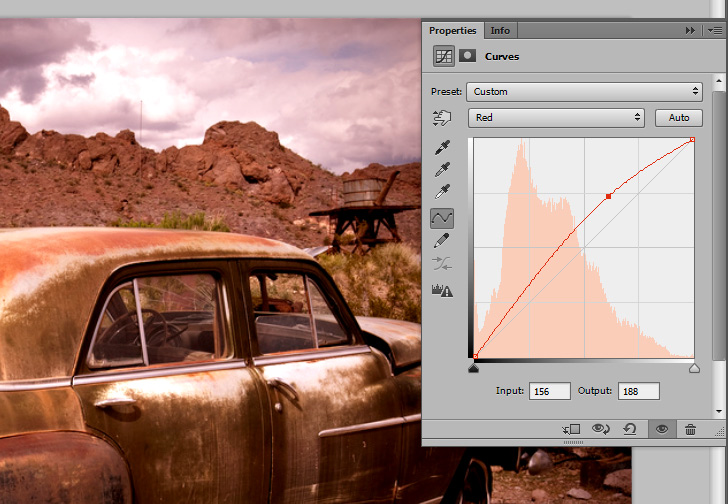
Change the Red channel to look similar to my example.
Change the Green channel to look similar to my example.

Change the Blue channel to look similar to my example.
Step 6 > Merge layers
To create similar blurred edges like the original Lomo images we need to use Iris Blur. Before we add iris blur we need to merge the layers. While pressing (Alt + Ctrl/CMD + Shift) in the layers option menu press Merge Visible, this will create a new layer but keep the curves adjustment layer. If this method is difficult, just press (Ctrl + E) to merge the 2 last layers.

Step 7 > Add iris blur
To add iris blur go to Filter > Blur > Iris Blur and use the following settings:
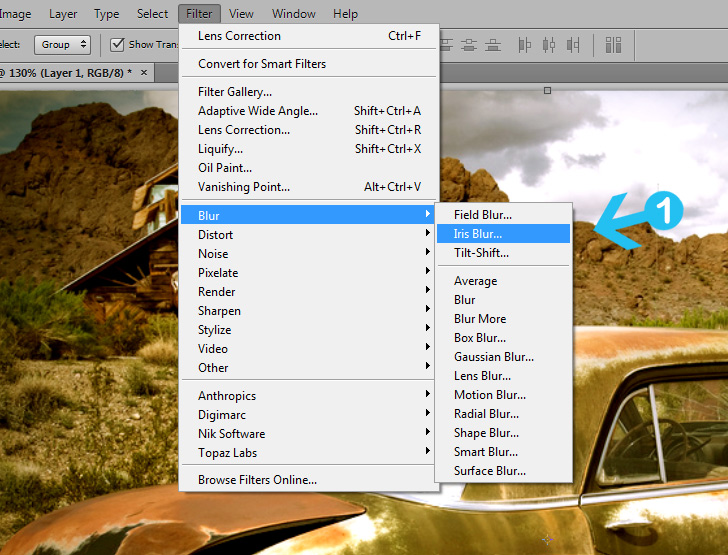
Add 2px Iris Blur and press OK.
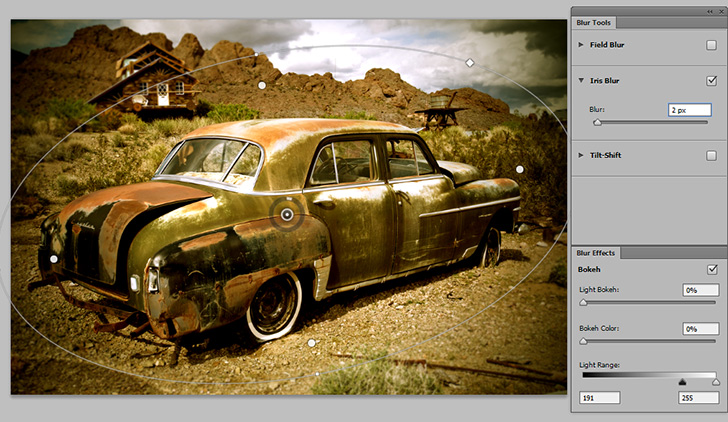
Step 8 > Sharpen the image
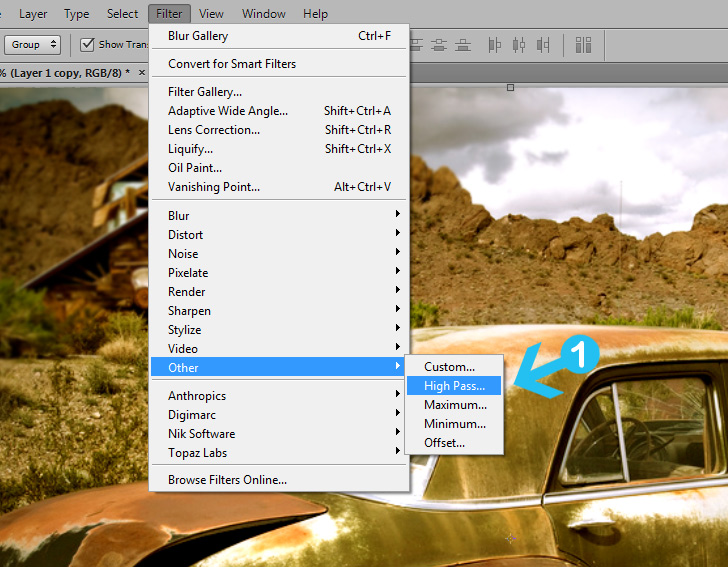
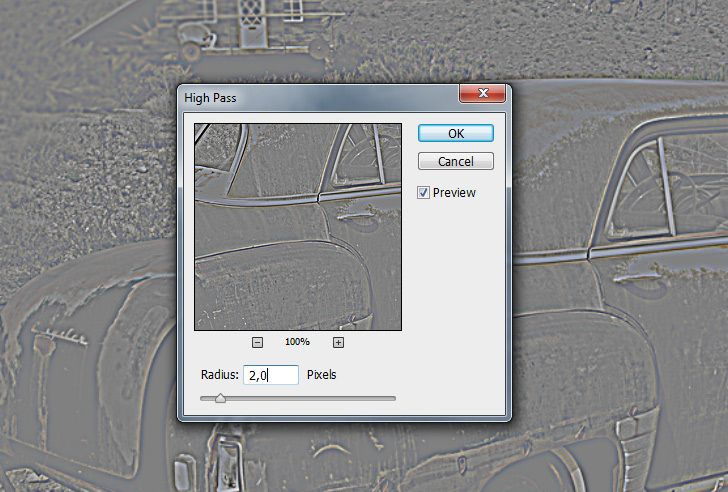
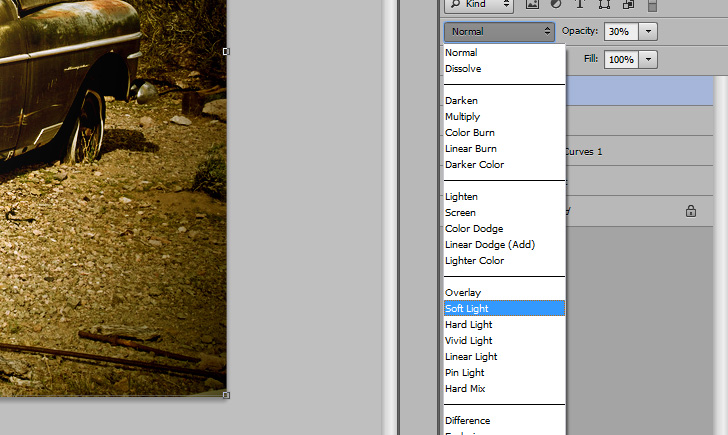
Go to Layer > Duplicate Layer to duplicate the existing layer. Next, go to Filter > Other > High Pass. In the new tab set Radius to 2 and press Ok. Finally set the blending mode to “Soft Light”.
Set Radius to 2.0 and press OK.
Step 9 > Add highlight
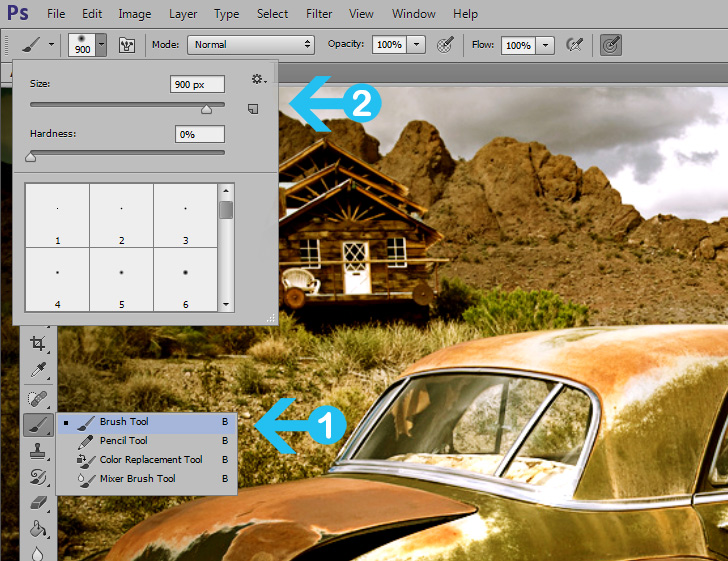
This step is optional and you can add a highlight by creating a new layer and drawing a soft large brush over the image. Set the brush size to 800 – 900pt and 0 hardness. Draw to the center of the image and set the blending mode to Hard Light or Soft Light.
Set the blending mode to Hard Light and opacity to 30%.
Conclusion
The most important step is step number 5. You can change the color tones and achieve different results. The last step when we added the highlight is optional but gives a nice look and creates even more contrast.

15,000+
Design Assets
- Instant Access
- Free Content Updates
- Constantly Growing Library
- Unlimited Downloads
- Simple Licensing


By Dreamstale
Get creative with our free & premium design resources. Download a vast collection of graphic design materials, such as graphics, sublimation designs, icons, textures, stock photos and more.
Plus get access to Photoshop tutorials & inspirational articles that will spark your imagination.


